TL;DR

Get baking supplies delivered free with Prime
- Fast, free delivery on millions of items
- Prime Video, Amazon Music and more included
- Member-only deals all year
A digital instant read thermometer gives you a quick measurement when color, timing, or touch alone cannot tell you whether food has reached the right temperature. Use it to check bread, yeast water, candy, and other temperature-sensitive recipes, and choose a model with a thin probe, clear display, suitable range, and clear care instructions.
A loaf can wear a deep golden crust and still hide a damp, gummy center. A quick temperature check can catch that mismatch before you slice it, giving you a better clue than color or bake time alone.
A digital instant read thermometer is one of the useful tools in a home baker’s kitchen because it replaces guesswork with a reading you can use. You’ll learn what to look for, how to check bread and other temperature-sensitive foods, and when a thermometer adds useful information without taking the place of the recipe.
Think of it as a small probe with a big job: it helps you make a more informed call when a few degrees can affect the result. You do not need Bluetooth or a complicated setup. Start with a dependable reading, a suitable temperature range, and the habit of cleaning the probe between foods.
Choose a fast digital instant read thermometer with a thin probe, clear display, and a range suited to baking and candy.
Many lean breads finish around 93–99°C (200–210°F), but follow your recipe and consider the bread style.
Check the thickest part of food without touching the pan, and wait for the reading to settle.
Most instant read models should not stay in the oven; use one there only if the manufacturer explicitly allows it.
Clean and dry the probe between foods, and check its accuracy using the maker’s instructions.
The Baker’s Essential Tool · Field Guide 01
The Digital Thermometer Every Baker Should Own
When color, timing, or touch leaves you guessing, a quick temperature reading gives you another useful clue. Check the center of a loaf, temper chocolate, or follow a candy stage with a dependable instant read probe.
The key insight
A golden crust can hide a damp, gummy center.
Measure where the bake can lag: the middleOne probe, many useful checks
Temperature adds information where surface cues can mislead. Recipes and food styles still set the target.
Check the crumb
Many lean loaves finish around 93–99°C (200–210°F). Use the recipe and loaf style to guide the call.
Mind the water
Water that is too hot can damage yeast; water that is too cool can slow fermentation. Follow the recipe’s temperature guidance.
Track the stage
Temperature helps distinguish stages such as soft ball, hard crack, and caramelization.
Watch the heat
Checks can help prevent overheating eggs or assess whether a bake has set. Texture and carryover cooking matter too.
Temper with context
A thermometer makes tempering more repeatable, while technique and chocolate type also affect the result.
One tool, if suited
A model may handle bread, candy, and meat when its range, accuracy, and probe design fit each task. Clean between foods.
Why the center matters: A dark pan, hot-running oven, or small loaf can brown the outside quickly. A center reading can reveal whether the crumb has had enough time to set. It is one cue alongside crust, structure, cooling, and recipe advice.
the middle
What to look for
A good everyday model is quick to read, easy to place, and suited to the temperatures you actually check.
Core buying checklist
- ✓Thin probe: reaches the center with less disruption.
- ✓Clear, quick display: easier to read while handling hot food.
- ✓Suitable range and accuracy: check specifications for baking and candy.
- ✓Care and calibration guidance: know how to clean it and check its accuracy.
Useful extras: A folding probe, backlight, rotating screen, or water resistance can help. Water resistance does not mean every part can be submerged.
Match the tool to the question
| Tool | Measures | Useful for |
|---|---|---|
| Instant read probe | Food temperature | Bread center, custard, candy checks |
| Oven thermometer | Oven air | Finding an oven that runs hot or cool |
| Connected features | Optional logging | Long monitoring; usually not needed for a spot check |
Oven rule: Most instant read models should not stay in the oven. Leave one there only when the manufacturer explicitly says it is oven safe.
Get a reading that answers the right question
Placement matters as much as the number. A probe against the pan can give a precise reading of the wrong thing.
Choose the thickest spot
For a round loaf, aim near the center, away from large air pockets.
Insert with care
Angle toward the middle and keep the sensing tip clear of the pan. For thin foods, enter from the side.
Wait for it to settle
Give the display time to stabilize before comparing the reading with a target.
Use recipe and cues
Consider the recipe, loaf style, crust, structure, and cooling. Clean and dry the probe afterward.
From guesswork to a better call
The thermometer supports observation; it does not replace the recipe or the baker’s judgment.
Common baker questions
What temperature should bread reach inside?
Many lean loaves finish around 93–99°C (200–210°F). Enriched breads and specific recipes may call for different cues.
Can I leave it in the oven?
Usually not. Only do so if the manufacturer explicitly says that model is oven safe.
Is digital better than analog?
Digital models generally give faster, easier-to-read measurements. Analog dials can work but may respond more slowly and need more room.
How can I check accuracy?
Follow the maker’s instructions. A common check is an ice-water slurry, which should read close to 0°C (32°F).
Does it replace bake time or visual cues?
No. Doneness also depends on crust, structure, recipe, pan, and carryover cooking.
Do I need Bluetooth?
No. Connectivity can help with monitoring over time, but a clear display and dependable quick reading usually matter more for everyday baking.
Why a thermometer can save a loaf from a gummy center
A digital thermometer helps you check whether the center of a loaf has reached a useful temperature for its style. Many lean breads finish around 93–99°C (200–210°F), though your recipe and loaf type still matter. That range is a clue about how far baking has progressed: heat has reached the center and helped set the crumb. It is not a universal finish line, because doughs with different moisture, sugar, fat, or size warm and set differently.
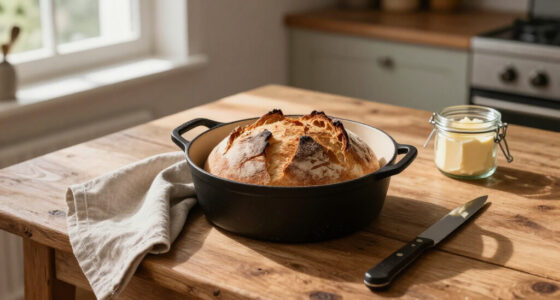
Crust color and timing can mislead you because they describe what is happening at the surface, not necessarily at the center. A dark pan, an oven that runs hot, or a small loaf can brown the outside quickly. The outside may look finished while the interior has not had enough time to set. Imagine pulling a handsome boule from the oven: the crust crackles as it cools, but the middle still feels tacky when you cut it. Checking the center before you call it done can reveal that gap and help you decide whether more baking is needed.
Insert the probe into the thickest part of the loaf, steering clear of the pan and any large air pocket. Wait for the reading to settle, then compare it with the recipe’s guidance. A reading from the center is useful because it samples the part most likely to lag behind the crust. The thermometer adds a measurement; it does not erase the value of a well-browned crust, a set structure, or the recipe’s advice about cooling. In particular, slicing while bread is still hot can make an adequately baked loaf seem gummy because the crumb is still settling.
Use the reading as one part of the decision. Enriched breads, dense loaves, and unusual formulas may behave differently from lean dough, so a familiar target may not transfer cleanly from one loaf to another. If a recipe gives a specific target, follow that target alongside the loaf’s appearance and texture. When the number and the visual cues disagree, consider the loaf style, probe placement, and recipe instructions before deciding; a measurement is most helpful when it supports careful observation instead of replacing it.
Products Worth Considering

Instant Pot InstantChill Ice Cream Maker with Rolled Ice Cream, No Pre-Freezing, 2-Pint

Le Creuset Enameled Cast Iron Round Bread Oven, 9.5-Inch, Cerise

Cuisinart ICE-70P1 2-Quart Ice Cream, Gelato, and Sorbet Maker
As an affiliate, we earn on qualifying purchases.
What to look for in a digital thermometer
The digital thermometer every baker should own is a fast, accurate instant read model with a thin probe, a clear display, and a range that fits both baking and candy making. These features matter because each removes a different source of uncertainty: a thin probe reaches the center of a loaf or custard with less disruption, a clear screen makes the number easier to read while handling hot food, and an appropriate range lets the same tool serve recipes with very different temperatures. Fast readings also limit how long you hold a probe in a hot oven or over a pan, though speed is only useful if the reading is dependable.
Check the product specifications for temperature range, accuracy, care, and whether the model can be adjusted or checked for calibration. Accuracy tells you how far a displayed number might be from the actual temperature, so it matters most when a recipe has a narrow working window, as candy and chocolate often do. A folding probe can make storage easier, while a backlit or rotating display can help when your hand blocks the screen. Water resistance may simplify cleanup, but it does not mean every part can be submerged; follow the maker’s instructions so a convenient rinse does not damage the display or handle.
Some newer models offer rechargeable batteries, Bluetooth, or app logging. Those features may help if you monitor temperatures over time, but most home bakers will get more everyday value from a clear display and a quick, dependable reading. Extra connectivity can record changes without requiring you to stand by the pan, but it adds setup and is less useful for a quick spot check. For example, when a pot of caramel is bubbling and you need to watch the temperature climb, a simple screen you can read at a glance matters more than a chart saved in an app.
An instant read thermometer and an oven thermometer do different jobs. The probe checks food; an oven thermometer helps you see whether the oven air runs hot or cool. This distinction can save you from buying the wrong tool to solve a baking problem: a loaf’s internal reading cannot tell you whether the oven temperature is inaccurate, and an oven thermometer cannot tell you whether the loaf’s center is ready. If your cookies brown unevenly even when you follow the recipe, checking the oven’s temperature may help explain the pattern. Choose an instant read thermometer for food checks, and add an oven thermometer if oven accuracy is the question.
How to check bread without piercing it in the wrong place
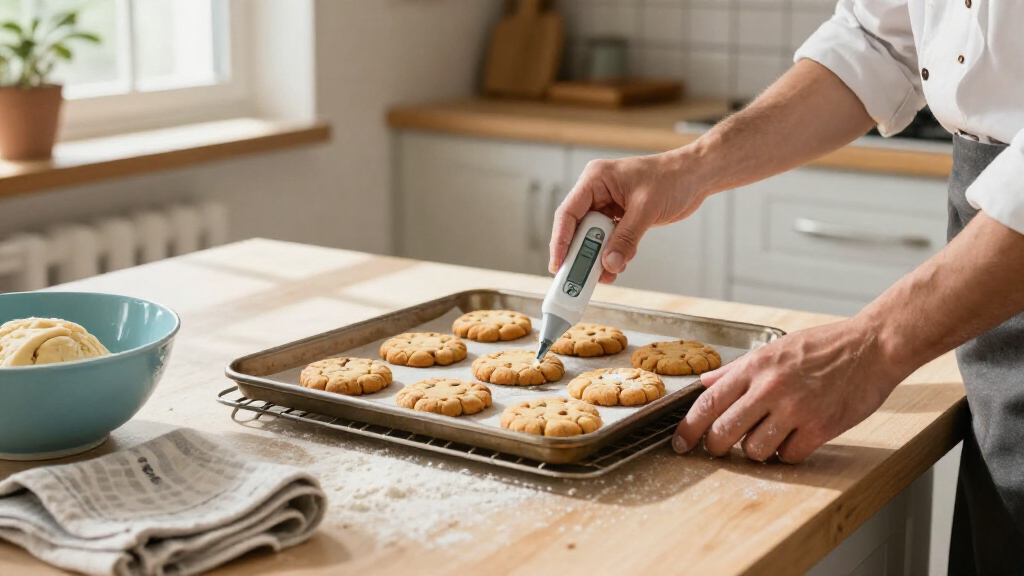
To check bread, insert the probe into the loaf’s thickest area and keep the sensing tip away from the pan. For a thin item, slide the probe in from the side so the sensing area sits fully inside the food. This placement helps you measure the food rather than the hot pan or a pocket of air. A poorly placed probe can produce a precise-looking number that answers the wrong question, so the location matters as much as waiting for the display.
- Choose the thickest spot. For a round loaf, that is usually near the center; for a narrow loaf, pick a substantial section away from the edge. The center is often the slowest area to heat, making it a useful check of whether the loaf is baked through.
- Insert the probe carefully. Angle it toward the middle and avoid touching the baking surface. Contact with the pan can skew the reading toward the pan’s temperature rather than the crumb’s.
- Wait for the display to stabilize. A changing number is not a settled reading. Pulling the probe too soon may leave you comparing the recipe target with a temporary reading.
- Compare the reading with the recipe. Use the recipe’s target and visual cues together. If they differ, reassess placement and consider the loaf’s style before extending the bake.
- Clean the probe. Wash it as the manufacturer directs before the next food. This removes residue and helps avoid carrying ingredients from one food into another.
For example, if you bake a small sandwich loaf and its top turns golden early, a reading in the center can help you decide whether it needs more time. If the center is still below the recipe’s target, you can continue baking while keeping an eye on the crust; if it has reached the target, the recipe’s other cues can help you avoid drying it out. If you are checking several loaves, clean the probe between them, especially when one contains an ingredient you need to keep separate from another food.
Do not assume every model belongs in a hot oven. Most instant read thermometers are designed for quick checks, not for staying in the oven during the bake. Their electronics and construction may not tolerate continuous oven heat, and leaving one in can damage it or give unreliable results. Leave a thermometer in the oven only when its manufacturer explicitly rates it for that use. A quick reading near the end of baking is usually the right approach for an instant read probe.
When yeast water, candy, and custards need a number
A thermometer is useful whenever a recipe depends on temperature for timing or texture. It can help you check yeast water, follow sugar stages for candy, and avoid overheating a custard, but each recipe has its own target. The same number can mean different things in different mixtures: temperature affects how yeast begins working, how sugar syrup behaves, and how quickly egg proteins thicken. The tool measures temperature; your recipe tells you what that number means.
Yeast water shows why “warm to the touch” can be too vague. Hands are poor measuring tools because what feels warm depends on your own skin temperature, and a few degrees can matter to yeast. Water that is too hot can damage yeast, while cooler water can slow fermentation. If a recipe gives a temperature range, check the water directly before adding it to the flour. On a busy morning, that quick check can keep you from guessing with a finger and wondering why the dough is slow to rise; it also helps distinguish a temperature issue from other causes of slow fermentation.
Candy making asks for even closer attention. Sugar stages such as soft ball and hard crack correspond to different temperatures because syrup’s concentration changes as water boils away, shaping how the cooled candy behaves. A thermometer can help you follow a recipe’s instructions as syrup bubbles and thickens, but placement matters: the probe should measure syrup without touching the pan, which can be hotter than the liquid. Caramel brings another change: its color can deepen quickly, and the pan’s heat may continue cooking the sugar after you move it. Follow the recipe carefully and keep your hands clear of hot syrup.
For custards and enriched doughs, temperature can help you judge whether a mixture is heating as expected, but texture and carryover cooking also matter. Heat thickens egg-based custards, and too much or too rapid heat can make the eggs curdle rather than form a smooth mixture. A custard can continue to set as it cools, so stopping at the recipe’s instructed point can prevent overcooking. For a real kitchen example, if a custard recipe asks for a specific heating target, measure in the mixture without letting the probe rest against the saucepan, then follow the recipe’s direction about when to stop.
Use the same probe for chocolate, with realistic expectations
A digital thermometer can make chocolate tempering more repeatable by helping you track temperature changes. It does not do the tempering for you: technique, chocolate type, and careful handling also affect the result. Tempering controls how cocoa butter crystals form as chocolate is heated, cooled, and brought back to a working temperature; those crystals influence whether the finished chocolate is glossy and snaps cleanly or looks dull and soft. Use the temperature targets in your recipe or chocolate maker’s guidance, since different chocolates can call for different working ranges.
Tempering often involves warming chocolate, cooling it, then bringing it to a working temperature. A thermometer helps you follow those changes rather than relying on a bowl that merely feels warm. Small temperature differences can change which cocoa butter crystals form, so a reading gives you a useful checkpoint during each stage. Imagine spreading a thin test streak on parchment: if it sets with a smooth surface and a crisp snap, that visual check complements the temperature reading. If it stays streaky or soft, the result suggests the temper may need attention. The reading gives you evidence to guide your next step, not a promise of success by itself.
Probe placement matters in a bowl of melted chocolate. Stir gently, then place the sensing area into the chocolate without scraping the bowl’s bottom. Stirring helps even out warmer and cooler pockets; the metal bowl may be warmer than the chocolate in some places, so contact with it can give you a misleading number. A thin probe also makes it easier to check a modest amount without disrupting the mixture. Take the reading in the chocolate after stirring, rather than treating a single measurement at the surface as representative of the whole bowl.
Keep water away from melted chocolate and dry the probe before inserting it. Even a small amount of water can cause chocolate to seize into a thick, grainy mass, which changes its texture and makes it difficult to use for dipping or coating. If you also use the thermometer for other foods, clean it between tasks and make sure it is completely dry before checking chocolate. That careful routine helps keep a smooth, glossy bowl ready for dipping strawberries or coating cookies.
Check accuracy and clean the probe between uses
Follow your thermometer’s care instructions, and check its accuracy using the method the manufacturer recommends. A common home check uses an ice-water slurry, which should read close to 0°C (32°F). This reference can show whether the thermometer is reading near a known temperature, but it does not guarantee equal accuracy across its entire range. That distinction matters for candy or chocolate, where you may be working far above freezing. The model’s instructions determine whether you can adjust it or only note the result.
To make an ice-water slurry, fill a glass with crushed ice and add enough cold water to fill the gaps. Stir, wait briefly, then place the sensing tip into the icy mixture without touching the glass. The ice and water together create a more stable reference than cold water alone, because the mixture stays near the ice’s melting temperature while both are present. If the reading sits noticeably away from 0°C (32°F), check the manual for calibration steps or contact the manufacturer about the model’s accuracy range.
Clean the probe after each food check, following the maker’s directions. A probe used on bread may seem clean, but it can carry dough or other residue into a custard or another recipe. If you prepare foods for someone with an allergy, use clean equipment and keep ingredients and utensils separate according to that person’s needs. Common allergens in baking include wheat, eggs, milk, soy, peanuts, and tree nuts; careful cleaning supports separation, while the person’s specific needs determine the full precautions to take.
For instance, after checking a loaf containing walnuts, wash the probe before using it in a plain custard. This matters because a small amount of residue can travel on the probe even when it is not visible. Do not immerse the display or handle unless the instructions say it is safe. Good cleaning protects the thermometer and keeps flavors and food residues from traveling from one task to the next.
Know what the reading can—and cannot—tell you
A thermometer tells you the temperature at the probe’s sensing area, not the full story of a bake. It cannot tell you whether a loaf has cooled enough to slice cleanly, whether its crust has the texture you want, or whether carryover cooking will change the result. Pair the number with what you can see and feel. This is why a temperature reading works best as a decision aid: it reduces uncertainty about one part of the process while leaving other signs for you to judge.
That distinction matters when a recipe uses a narrow window. A custard may keep setting after you remove it from the heat, and caramel may continue darkening in a hot pan. When your recipe directs you to stop heating below the final target, follow that instruction rather than chasing the number after the pan is off the stove. The heat stored in the pan and mixture can continue changing the result, so temperature and timing work together.
A thermometer also cannot correct an oven that bakes unevenly or a dough that was mixed differently from the recipe. If one side of a loaf browns faster, rotating the pan when the recipe permits may help; if every bake runs early, an oven thermometer can help you check the oven itself. These tools answer different questions: an instant read probe checks the food’s interior, while an oven thermometer checks the surrounding heat. Knowing which question you have can help you choose a useful next step instead of changing the wrong part of the process.
Use the reading to make a more informed choice, especially when appearances conflict. If a loaf looks dark but the center is below the recipe’s target, you can decide whether it needs more time while watching the crust. If the reading fits the target but the recipe calls for a crisp crust, you can still use the visual cue. Good baking comes from combining measurements with observation, so one cue can inform your decision without having to carry the whole decision by itself.
Frequently Asked Questions
What temperature should bread reach inside?
Many lean loaves finish around 93–99°C (200–210°F), but enriched breads and specific recipes can call for different cues. Check the thickest part and use the recipe’s guidance along with the loaf’s color and structure.
Can I leave an instant read thermometer in the oven?
Usually not. Most instant read models are made for quick checks, so leave one in the oven only if its manufacturer explicitly says it is oven safe. Check the instructions before using it that way.
Can one thermometer handle bread, candy, and other foods?
Often, if its temperature range, accuracy, and probe suit each task. Check the model’s specifications and clean the probe between foods, especially when ingredients need to stay separate.
How do I check whether my thermometer is accurate?
Follow the manufacturer’s method. A common check uses an ice-water slurry that should read close to 0°C (32°F); some models can be adjusted, while others only let you check the reading.
Is a Bluetooth thermometer necessary for home baking?
No. Bluetooth can help with monitoring or recording, but a dependable probe and a readable display are more useful for most everyday checks. Pick connected features only if you have a specific use for them.
Conclusion
Keep a dependable digital instant read thermometer within reach and use it when a recipe’s temperature matters. A thin probe, quick reading, and clear display will serve you better in everyday baking than a stack of extra features you rarely use.
When your next loaf comes out golden and singing softly as it cools, check the center before you slice. A few seconds with the probe can help turn a hopeful guess into a more confident bake.