TL;DR

Get baking supplies delivered free with Prime
- Fast, free delivery on millions of items
- Prime Video, Amazon Music and more included
- Member-only deals all year
Crème brûlée is chilled custard topped with a thin layer of caramelized sugar. Bake the custards gently in a water bath, chill them thoroughly, then spread a light, even layer of granulated sugar across each dry surface and torch it to amber just before serving. A moving flame and timely caramelizing help create a crisp top without overheating the custard.
The best part of crème brûlée happens in two sounds: the little tap of a spoon, then the crisp crack as it breaks through caramel. Under that glassy, amber top sits cool, softly set custard. You can make both textures at home with everyday ingredients and a little attention to heat.
Crème brûlée means chilled custard topped with a thin layer of caramelized sugar. The recipe itself is straightforward, but three details change the result: bake gently, chill thoroughly, and spread the sugar in a thin, even coat. Think of the sugar like a pane of glass: one smooth layer snaps cleanly; a thick, lumpy one takes a hard knock.
This guide walks you through the ingredients, water bath, chilling time, and torch technique, plus fixes for a runny custard or sticky top. You’ll also find a broiler option and make-ahead advice. The goal is a dessert with a creamy spoonful below and a crisp, delicate snap above.
Bake the custard in a water bath and remove it when the edges are set but the center still trembles slightly.
Chill the custards for several hours and keep their surfaces dry before adding sugar.
Use a thin, even coating of granulated white sugar; tip out excess before torching.
Sweep the torch across the surface and stop when the caramel turns amber.
Bake ahead, but caramelize shortly before serving so the crust stays crisp.
A kitchen guide · Custard & caramel
How to Make Crème Brûlée With a Glassy Caramel Top
Build the contrast that makes every spoonful memorable: cool, softly set custard beneath a thin amber shell that cracks cleanly. Gentle baking, thorough chilling and an even sugar layer do the work.
Simple ingredients, deliberate choices
Rich cream and egg yolks make the tender custard; vanilla gives it its familiar warmth. Shallow ramekins bake evenly and leave a broad surface for a thin, crisp caramel layer.
Cream + yolks
Heavy cream, egg yolks, sugar, vanilla and a pinch of salt make a smooth, rich custard. Whisk only until combined to avoid excess bubbles.
White sugar
Granulated sugar melts and browns predictably. Use a light coating, spread it to the edges, then tip away what does not stick.
Torch or broiler
A kitchen torch offers precise control. A broiler can work, but it warms the custard too; watch closely, especially with deeper ramekins.
Bake gently in a water bath
Gradual heat helps the custard set smoothly instead of turning watery or curdled. Take it from the oven while the edges are set and the middle still gives a slight tremble; it will continue setting as it cools.
Warm the cream
Add vanilla and heat until steaming, not boiling. Let a vanilla bean steep for deeper flavor.
Temper slowly
Whisk yolks and sugar, then stream in warm cream gradually to avoid scrambling the eggs.
Strain + portion
Pass the mixture through a fine strainer for a smooth finish, then fill shallow ramekins.
Bake in water
Set ramekins in a roasting pan with hot water around them. Remove at a gentle wobble.
Read the movement
The edges should look set. When nudged, the center should move as one soft custard, not ripple like liquid. If it sloshes, bake briefly longer and check again.
Handle the bath carefully
Hot water buffers the ramekins from direct oven heat. Lift the pan steadily, then let the custards cool before covering and refrigerating.
Cold custard, dry surface, crisp finish
Chill the custards until cold and set, usually for several hours. A cold base helps the caramel form while limiting how much the flame warms the creamy layer underneath.
Check before sugaring
If condensation forms, gently blot it with a clean paper towel. A dry surface helps the sugar melt evenly instead of clumping like damp sand.
Make ahead with ease
Bake and chill in advance, then caramelize just before serving. Keep egg-based custard refrigerated and bring it out when you are ready to finish.
Move the flame; follow the color
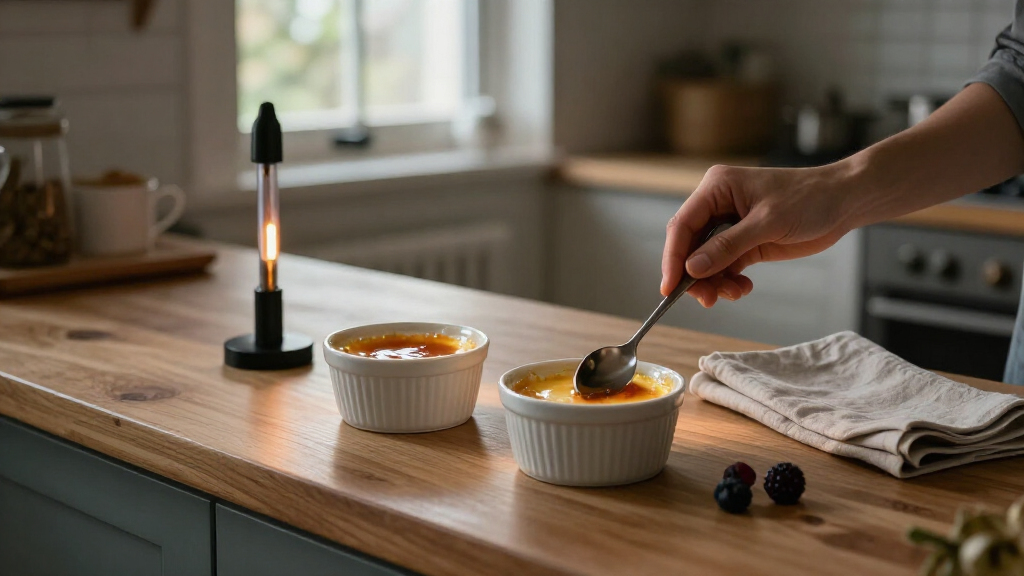
Dust on a small amount of sugar, tilt and tap the ramekin to cover the surface, and tip out the excess. Sweep the torch steadily until the sugar melts into one glossy amber sheet.
Dust lightly
Scatter a small amount of granulated sugar across the cold, dry custard.
Level the coat
Tilt and tap to reach the edges, then pour off excess for a delicate shell.
Sweep the torch
Keep the flame moving over the surface. Revisit a pale patch instead of heating everything longer.
Stop at amber
Let the caramel harden briefly, then serve while the top is crisp and snappy.
Small adjustments, better texture
Most problems come down to heat, moisture or an uneven sugar layer. Use the cue you can see and correct it before serving.
From silky center to spoon crack
Each stage sets up the next. Keep the custard chilled, the sugar thin, and the caramel finish close to the moment you serve.
Choose ingredients and ramekins that help the custard set evenly
To make crème brûlée with a glassy caramel top, start with cream, egg yolks, sugar, vanilla, and a pinch of salt, then choose shallow ramekins for even baking. Heavy cream and yolks give the custard its rich, tender set, while vanilla brings the familiar warm aroma. A shallow dish gives the custard a shorter path to heat and leaves enough surface for a satisfying layer of caramel.
Use granulated white sugar for the top because it melts and browns predictably. Brown sugar can work, but its moisture and composition may make the crust less even. A thin, level coat matters more than piling on extra sugar; too much creates a thick shell that is difficult to crack and can taste harsh before the custard beneath gets a spoonful.
A small kitchen torch gives you control because you can move the flame across the surface without heating the whole ramekin as much. If you do not own one, a broiler can brown the sugar, but it heats the custard too, so watch closely. For example, if your ramekins are deep, a broiler may warm the edges before the center of the sugar turns amber.
Keep the ingredient list simple if you want the vanilla to shine. Citrus zest, coffee, or a small amount of spice can infuse the cream, but strain out solids before mixing in the yolks. This gives you a smooth surface and a flavor that complements the custard instead of competing with it.
Products Worth Considering

Cuisinart 8-in-1 Air Fryer Toaster Oven with Grill, 1800W, Stainless Steel

Cuisinart 14-Cup Food Processor, 720-Watt, Stainless Steel (DFP-14BCNY)

Breville BES870XL Barista Express Espresso Machine, Brushed Stainless Steel
As an affiliate, we earn on qualifying purchases.
Bake a silky custard with a gentle water bath
For smooth crème brûlée, warm the cream gently, temper the yolks, strain the mixture, and bake the filled ramekins in a water bath until the edges set and the center still trembles. This gradual approach helps you avoid scrambled eggs and a watery, overcooked custard. A gentle wobble is a better cue than waiting for the whole surface to look firm, because the custard continues to set as it cools.
- Warm the cream. Add vanilla and heat until steaming, not boiling. If using a vanilla bean, let it steep in the warm cream for more flavor.
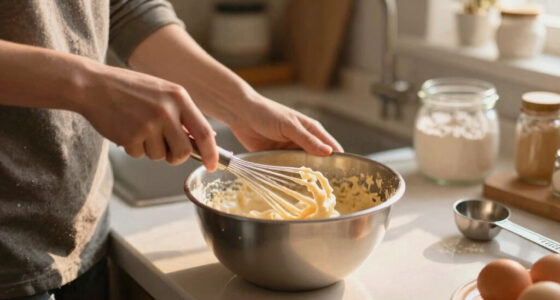
- Mix the yolks and sugar. Whisk just until combined. Vigorous whisking adds foam and bubbles you do not want in the finished custard.
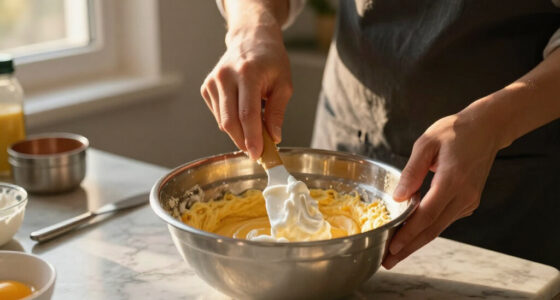
- Temper slowly. Whisk a small stream of warm cream into the yolks, then gradually mix in the rest. This raises the yolks’ temperature without scrambling them.
- Strain and portion. Pour the mixture through a fine strainer to catch cooked egg bits and vanilla pod pieces.
- Bake in a water bath. Set ramekins in a roasting pan and add hot water around them. Bake gently until the edges look set and the center wobbles slightly when nudged.
For example, if one ramekin jiggles like liquid while the others move as a single soft center, return the pan to the oven for a short interval and check again. Lift the ramekins carefully; the hot water can slosh. Use oven mitts and set them on a stable surface before cooling.
The water bath cushions the custards from direct oven heat, much like a buffer that smooths out sudden changes. It helps the edges and center cook more evenly. Take the ramekins out when they have that gentle tremble, then let them cool before refrigerating.
Chill the custards fully before you caramelize the sugar
Chill crème brûlée until the custard is cold and set, usually for several hours, before adding the sugar. A cold base gives you a better contrast between the cool, creamy filling and the warm caramel shell, and it helps limit how much the flame heats the dessert. Patience in the fridge pays off at the table: a warm center can feel loose even when the crust looks perfect.
Cover cooled ramekins before refrigerating, and keep them chilled until you are ready to serve. Egg-based custard needs prompt refrigeration and careful cold storage. As a practical food-safety habit, do not leave the dessert sitting out for a long stretch; bring it out when you are ready to caramelize and serve it.
Make-ahead plans work well here. You can bake and chill the custards in advance, then finish each top shortly before dessert. Imagine hosting dinner: the ramekins can wait in the refrigerator while you clear the plates, and the torching becomes a quick final step rather than a last-minute baking project.
Check that the custard surface is dry before you add sugar. If condensation has formed, gently blot it with a clean paper towel. Moisture can cause the sugar to clump or melt unevenly, like damp sand instead of a smooth dusting. A dry surface gives you a better chance of a continuous caramel layer.
How to make a thin, glassy caramel top
To make a glassy caramel top, cover the cold, dry custard with a thin, even layer of granulated sugar and sweep a kitchen torch over it until it melts into an amber sheet. Keep the flame moving and stop when the color resembles light copper. Pale sugar may remain under-caramelized, while very dark sugar can taste bitter.
- Dust the surface lightly. Sprinkle a small amount of sugar over the custard rather than dumping it in one spot.
- Spread it evenly. Tilt and tap the ramekin so sugar reaches the edges, then tip out the excess.
- Torch in sweeping passes. Hold the flame over the sugar and move it steadily across the surface. Avoid parking it in one place.
- Watch the color. As the grains melt, the top changes from white to glossy and then amber. Stop before it turns very dark.
- Let it harden briefly. Give the caramel a short moment to set, then serve while it still snaps.
The target is a thin, layer of caramelized sugar that forms one continuous sheet. Too little sugar leaves bare patches that break the spoon’s rhythm; too much makes a heavy lid. If you spot a pale edge while torching, move the flame back over that patch instead of increasing the heat across the whole custard.
Caramelize close to serving time because moisture gradually softens the crust. A ramekin torched an hour early and returned to the fridge may still taste good, but the sharp crack can give way to a tacky chew. For a dinner party, torch the portions after the main course and carry them straight to the table.
Fix runny custard, bubbles, and sticky caramel
Most crème brûlée problems trace back to heat, air, moisture, or timing. A custard that bakes too hot or too long can turn curdled or watery; one that has not chilled long enough may stay loose. Small bubbles often come from whisking too vigorously, while uneven sugar or a stationary torch can leave pale patches beside bitter ones.
- Runny center: Check that the custard has chilled for several hours. If it was loose before chilling, it may have needed more gentle oven time; look for set edges and a slight center wobble next time.
- Curdled or grainy texture: Use the water bath and avoid baking until the center is firm. Gentle heat gives the egg yolks time to set smoothly.
- Foamy top or bubbles: Whisk gently, strain the mixture, and skim foam before filling the ramekins.
- Patchy caramel: Dry the custard surface and distribute sugar evenly. Tip out excess so you do not create a thick mound.
- Bitter caramel: Keep the torch moving and stop at amber. A blackened spot will taste burnt even if the rest looks right.
- Sticky crust: Caramelize just before serving. Humidity, refrigeration, and time all soften the sugar shell.
For instance, if your custard looks smooth but the top turns sticky while you finish dinner, the custard may be fine; the topping simply absorbed moisture. The next time, leave the chilled ramekins untopped until dessert. This separates a timing problem from a baking problem and helps you change only the step that needs attention.
A broiler can rescue a torch-free kitchen, but it needs close watching. Place cold ramekins under the broiler and monitor the sugar continuously; the heating element can brown one spot quickly and warm the custard at the same time. Remove the ramekins as soon as the sugar turns amber.
Plan ahead without losing the crisp spoon crack
You can make crème brûlée ahead by baking and chilling the custards, then caramelizing the sugar shortly before serving. The custard and topping follow different timelines: the base benefits from several hours in the refrigerator, while the caramel is at its crispest when freshly made. Keep them separate until the finish and you get easier hosting without sacrificing texture.
Here is a simple dinner-party scenario. Bake the custards the day before, cool them, cover each ramekin, and refrigerate. When you are ready for dessert, uncover them, blot any condensation, add the sugar, and torch the tops. Guests get the satisfying crack while you avoid juggling a hot oven after the meal.
Uncaramelized custards can generally keep in the refrigerator for a few days when covered, though the exact storage time depends on your refrigerator and handling. Keep them cold and discard any custard that has been left out too long or seems spoiled. The finished dessert contains egg and dairy, so prompt refrigeration matters.
Infusions can fit into this schedule without adding much work. Steep citrus zest, coffee, or spices in the warm cream, then strain before you temper the yolks. A teaspoon of coffee beans steeped in the cream, for example, gives a gentle roasted note that pairs with the bitter-sweet caramel. Keep additions restrained so the custard still sets and the vanilla or infusion remains clear.
Frequently Asked Questions
Can I make crème brûlée without a kitchen torch?
Yes. Use a broiler to melt and brown the sugar, with the custards cold and close attention on the surface. Check constantly because the broiler can heat the custard as well as the sugar.
How do I know when crème brûlée is done baking?
The edges should look set while the center still trembles gently when you nudge the ramekin. It will firm as it cools and chills, so do not wait for the entire custard to look rigid in the oven.
Why is my crème brûlée custard runny?
It may be underbaked or not fully chilled. Bake until the edges are set and the center wobbles slightly, then refrigerate for several hours before serving.
What sugar makes the most even caramel top?
Granulated white sugar is a dependable choice because it melts and browns predictably. Spread a thin, even coat and remove extra sugar; a thick layer can be hard to crack and may turn bitter.
Why did the caramel top turn sticky?
Moisture, refrigeration, and time soften caramel. Keep the custards chilled without sugar on top, then torch the sugar shortly before serving for the crispest shell.
How long can I store crème brûlée?
Covered, uncaramelized custards can generally stay refrigerated for a few days. Keep them cold, and make the caramel just before serving; once topped, the crust gradually loses its snap.
Conclusion
Remember the order: bake gently, chill completely, then caramelize a thin, even layer of sugar at the last minute. Amber is your cue; keep the torch moving and let the crust harden briefly before serving.
That little spoon tap should meet a crisp shell and give way to cool custard. Make the base ahead, save the flame for the finish, and let the first crack announce dessert.