
TL;DR
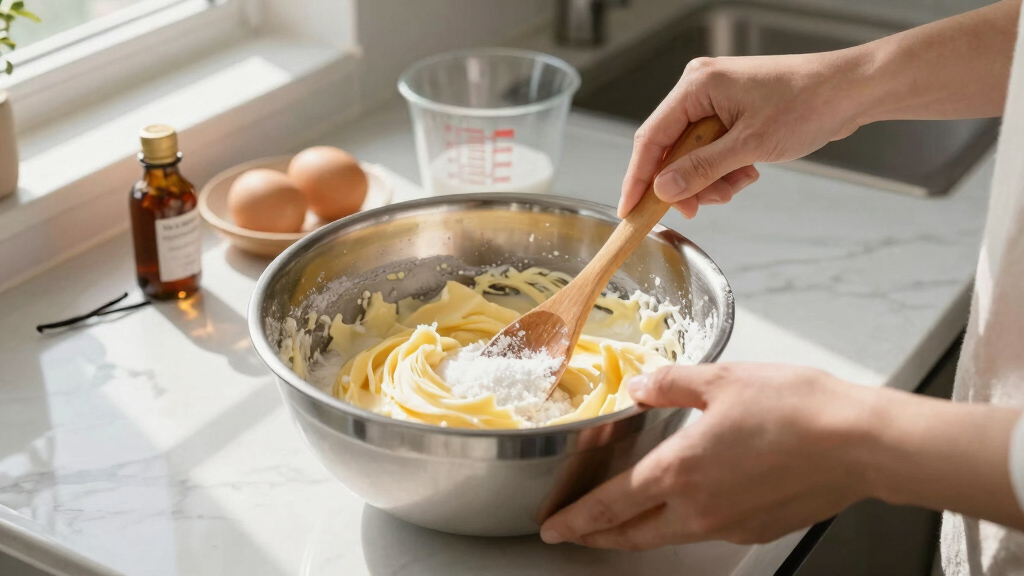
Creaming butter and sugar properly involves beating until the mixture is pale, fluffy, and has increased in volume—usually 3-5 minutes. Rushing this step leads to denser baked goods, while overdoing it can cause spreading. Visual cues matter more than clock-watching.
Cream until the mixture is pale, fluffy, and has increased in volume by about 50%.
Visual cues matter more than strict timing — look for color and texture changes.
Stop creaming too early, or your baked goods will be dense and flat.
Over-creaming can cause your batter to become greasy, leading to spreading issues.
Use tools like stand mixers and timers as guides, but rely on your eyes and touch.
Why Proper Creaming Turns Ordinary Into Extraordinary
Proper creaming of butter and sugar is the key to a light, tender crumb. When you beat butter and sugar until fluffy and pale, you trap tiny air bubbles that expand during baking, giving your treats that airy lift. Think of it as inflating a balloon — the more evenly you do it, the bigger and more stable it becomes. Skimp on this step, and your baked goods can turn out dense, flat, or rubbery, especially when you’re aiming for cookies or sponge cakes.
But why does this matter so much? The trapped air acts as a leavening agent, helping baked goods rise without relying solely on chemical leaveners like baking powder. If you don’t create enough air pockets, your cake might be heavy and dense, and cookies could spread flat instead of holding their shape. Additionally, creaming helps incorporate sugar evenly, which influences texture and sweetness distribution. The tradeoff is timing: over-creaming can cause the mixture to become greasy or overly airy, leading to a crumb that collapses or spreads too much. Understanding this balance allows you to optimize your baking results, ensuring a tender, well-structured final product.
Kitchen in the box Stand Mixer,3.2Qt Small Electric Food Mixer,6 Speeds Portable Lightweight Kitchen Mixer for Daily Use with Egg Whisk,Dough Hook,Flat Beater (Black)
Compact Designed And More Color Options – The stand mixer is less than 7lbs with dimension 12.9*7*10.2 In,…
As an affiliate, we earn on qualifying purchases.
As an affiliate, we earn on qualifying purchases.
How to Recognize When You’ve Creamed Enough
Knowing when to stop is more about visual cues than the clock. Properly creamed butter and sugar should be about 50% larger in volume. The mixture turns a creamy, light beige color and feels fluffy to the touch. It should hold soft peaks if you lift a spatula — like whipped cream that’s just starting to form. This indicates that enough air has been incorporated to achieve the desired volume and structure. For instance, after about 4 minutes on medium speed with a stand mixer, your mixture should look like a cloud of silk threads, indicating optimal aeration.
Why do these cues matter? Because the volume increase and color change reflect the extent of air incorporation and sugar dissolution, directly impacting the final texture. Rushing this step or stopping too early means fewer air pockets, resulting in baked goods that are dense, heavy, or unevenly textured. Using a clear bowl or a light-colored surface helps you see these changes more clearly, ensuring you don’t rely solely on timing, which can vary with equipment and ingredient temperature. Remember, patience here is key — the quality of your baked goods depends on it.

Antonki 2 Pack Digital Timer for Kids, Magnetic Countdown Kitchen Timers for Cooking, Egg, Classroom, Teacher, Exercise, Study, Oven – Battery Included
Count up & Countdown timer. You must want a reliable timer to know when to start or stop…
As an affiliate, we earn on qualifying purchases.
As an affiliate, we earn on qualifying purchases.
Timing vs. Visual Cues: Why Patience Matters
Many bakers rely on time alone, but this can be misleading. The ideal creaming duration varies with your equipment, butter temperature, and even ambient humidity. The real trick? Watch for the mixture to turn a pale, creamy color and to look fluffy and increased in volume. These cues ensure you’ve achieved the right amount of air incorporation, regardless of the exact duration.
Why is this important? Because over-creaming can be just as problematic as under-creaming. If you beat beyond 5 minutes, especially with warm or softened butter, the mixture can become greasy, causing baked goods to spread excessively or collapse. Conversely, stopping too early means insufficient air, leading to dense textures. The tradeoff is patience: waiting for the visual cues guarantees a better structure and rise. Relying solely on time might tempt you to rush or overdo it, but observing the mixture’s appearance and feel ensures optimal results every time.

ChefAide 5 Pieces Silicone Spatula Set, Food Grade Rubber Spatula, Upgrade Strong Handle with Ergonomic Grip, Heat Resistant Up to 600°F for Nonstick Cookware, Cooking
Premium 100% Food Grade Silicone: The silicone spatula set is made of healthy and friendly material, resistant to…
As an affiliate, we earn on qualifying purchases.
As an affiliate, we earn on qualifying purchases.
Common Mistakes That Ruin Your Creaming Success
Stopping too early is a top culprit. It leaves your baked goods dense and flat because insufficient air was trapped during creaming. Over-creaming, on the other hand, can make the mixture greasy, leading to spreading and an undesirable texture. Using butter that’s too cold or too warm also hampers the process. Cold butter won’t incorporate air well, resulting in less volume and poor aeration, while warm butter can turn greasy and separate, ruining the structure of your batter. These mistakes often stem from misjudging the ideal creaming point and can be easily avoided by understanding the visual and tactile cues.
Imagine trying to whip a stick of butter straight from the fridge — it’s like stirring thick glue, and it won’t trap air effectively. Conversely, melted or overly soft butter creates a greasy mixture that spreads out in the oven, flattening your baked goods and compromising their appearance and texture. Recognizing these pitfalls and adjusting your approach ensures a lighter, more consistent bake every time.
baking mixing bowls set
As an affiliate, we earn on qualifying purchases.
As an affiliate, we earn on qualifying purchases.
Tools and Tips to Nail Your Creaming Every Time
Use a stand mixer with a paddle attachment for consistent results. Set a timer, but don’t rely solely on it. Instead, look for the mixture to double in size, turn pale, and become fluffy. An additional trick? Drop a small amount of the mixture onto your wrist — it should feel cool and silky, not greasy or sticky. This tactile test helps you gauge whether the mixture has reached the ideal creaming point without overdoing it.
For example, some bakers set a timer for 4 minutes and watch for the color change and volume increase. If your mixture hasn’t reached those cues, keep beating in short bursts, checking every 30 seconds. Remember, tools like a light-colored bowl and a timer are guides, but your eyes and touch are the ultimate judges of proper creaming.
Comparison: How Long Should You Really Cream?
| Method | Expected Duration | Visual Cues | Notes |
|---|---|---|---|
| Time-Based | 3-5 minutes | Light, fluffy, increased volume by 50% | Depends on mixer speed and butter temp |
| Visual Cues | Varies; usually 3-5 minutes | Pale color, fluffy texture, soft peaks | More reliable than time alone |