
TL;DR
Creaming butter and sugar thoroughly doubles the mixture’s volume, creating air pockets that make baked goods fluffy. Stopping too early means missing out on this vital step, resulting in denser treats. Patience and proper timing are your best tools for success.
When you bake, the difference between a cookie that melts in your mouth and one that’s dense and flat often comes down to how well you cream butter and sugar. It’s a step that many overlook or rush through, but it’s the secret weapon for light, airy treats. If you’ve ever wondered why your baked goods fall flat or turn out dense, chances are you stopped the creaming process too early.
In this guide, you’ll learn exactly how long to cream, what the perfect texture looks like, and how to tell you’ve gone far enough. Whether you’re making cookies, muffins, or cakes, mastering this step will transform your baking—making everything from your chocolate chip cookies to fluffy sponge cakes consistently better.
Cream butter and sugar for a full 3-5 minutes until the mixture is pale, fluffy, and doubles in size.
Use room temperature butter for easier aeration and a smoother mixture.
Stop creaming too early and you’ll end up with dense, flat baked goods.
A stand mixer with a paddle attachment simplifies the process and ensures consistency.
Patience during this step yields the light, tender texture you’re after.
Why Proper Creaming Turns Your Baked Goods from Flat to Fluffy
Proper creaming is about incorporating enough air into butter and sugar to create a light, tender texture. When done right, the mixture becomes pale, fluffy, and nearly doubles in volume. This process might seem simple, but its importance is profound. The air trapped during creaming acts as the leavening agent that helps baked goods rise, giving them that desirable airy crumb. Without enough aeration, baked goods tend to be dense, heavy, and less appealing.
Think of it like inflating a balloon: the more air you trap, the more your baked goods will expand and develop a soft, tender structure. If you stop too early, you’re essentially leaving that air behind, which results in treats that are flat, chewy, or heavy, lacking that lightness we desire. The tradeoff is patience—creaming takes time, but the payoff is a better crumb and improved texture. Skipping or rushing this step often leads to a noticeable difference in the final product’s quality.
For example, a batch of cookies where you only beat for 1 minute might come out flat and chewy, while a properly creamed batch (about 3-5 minutes) will be tender, airy, and have a finer crumb. The extra effort during creaming translates directly into a more professional, appealing bake.
stand mixer with paddle attachment
As an affiliate, we earn on qualifying purchases.
As an affiliate, we earn on qualifying purchases.
How to Recognize When You’ve Actually Finished Creaming
- The mixture is pale and creamy: It shifts from a yellowish hue to a light, almost white shade, indicating oxidation and aeration are complete, which is crucial for the structure of your baked goods.
- It’s fluffy and airy: When you lift the beaters, the mixture forms soft peaks that hold briefly before melting back. This peak formation signifies that enough air has been incorporated to give the batter lift.
- It has doubled in volume: A visual cue—your mixture should be noticeably larger, reflecting the expansion of air bubbles within it. This volume increase is directly linked to the leavening power of creaming.
- It feels light and smooth: Not sticky or greasy, but soft and velvety to the touch, which indicates the mixture has reached its optimal aeration without becoming overworked, which could deflate the air pockets.
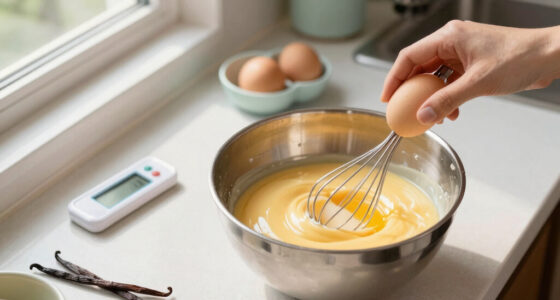
For example, after about 4 minutes on medium speed with an electric mixer, your butter and sugar should resemble a light, airy cloud—almost like whipped cream but thicker. Recognizing these signs helps ensure you don’t under- or over-cream, both of which can compromise your final bake’s texture and rise.
Don’t rush this step. Rushing might mean missing the peak of aeration, which impacts how your baked goods rise and their overall lightness. Patience here ensures the perfect balance of air and structure.
kitchen mixing bowls for baking
As an affiliate, we earn on qualifying purchases.
As an affiliate, we earn on qualifying purchases.
Common Mistakes That Stop Your Creaming Too Early (And Why It Matters)
Stopping before your mixture reaches that fluffy, pale stage is the most common mistake home bakers make. Many assume it’s ready once it looks somewhat creamy—big mistake. This premature halt prevents the mixture from developing the necessary volume and structure that are critical for leavening and texture.
If you stop too soon:
- Your cookies may turn out dense and flat because they lack the trapped air needed to expand during baking.
- Cakes might not rise properly, ending up with a tight crumb and less tender interior due to insufficient aeration.
- Muffins can be heavier and less tender, as the batter hasn’t been properly loosened and aerated.
On the flip side, over-cream can sometimes lead to overly airy or fragile baked goods, but generally, under-creaming is the bigger culprit for flat results. Over-creaming can cause the fat to break down or become overly aerated, which may weaken the structure, but the more common issue is stopping too early and missing the opportunity for proper leavening.
For instance, a quick beat of 1-2 minutes won’t trap enough air, leaving your batter dense and heavy. The key is patience—allow the mixture to reach that perfect, fluffy stage to ensure your baked goods rise and develop the right texture. Rushing this step can compromise the entire baking process, leading to less desirable results.

Hamilton Beach 6-Speed Electric Hand Mixer with Whisk, Traditional Beaters, Snap-On Storage Case, 250 Watts, White
NO MORE LOST BEATERS: The snap-on storage case that comes with the Hamilton Beach hand mixer neatly holds…
As an affiliate, we earn on qualifying purchases.
As an affiliate, we earn on qualifying purchases.
The Perfect Creaming Time and Technique for Consistent Results
| Step | What to Do | Expected Result |
|---|---|---|
| Start | Use room temperature butter, soft but not melted. Combine with sugar in a bowl. | Butter and sugar are just starting to blend, but not yet fluffy. |
| Mix | Beat on medium speed for 3-5 minutes, scraping down sides often. | Mixture becomes pale, fluffy, and doubles in volume. Looks like whipped cream. |
| Check | Observe color, texture, and volume. It should be airy and soft. | Ready for the next step. |
Many bakers find that using a stand mixer with a paddle attachment makes this easier and more consistent. Keep an eye on the clock and your mixture’s appearance, not just the speed or duration alone. The timing is crucial because rushing or under-creaming can lead to poor rise and dense texture, while over-creaming might weaken the fat structure, causing fragile baked goods.
Remember: patience pays off. Rushing this step means sacrificing that perfect rise and tender crumb. Proper technique ensures the trapped air is maximized without overworking the mixture, striking the right balance for optimal baking outcomes.
baking utensils set
As an affiliate, we earn on qualifying purchases.
As an affiliate, we earn on qualifying purchases.
Modern Tools and Tips to Nail the Crease Every Time
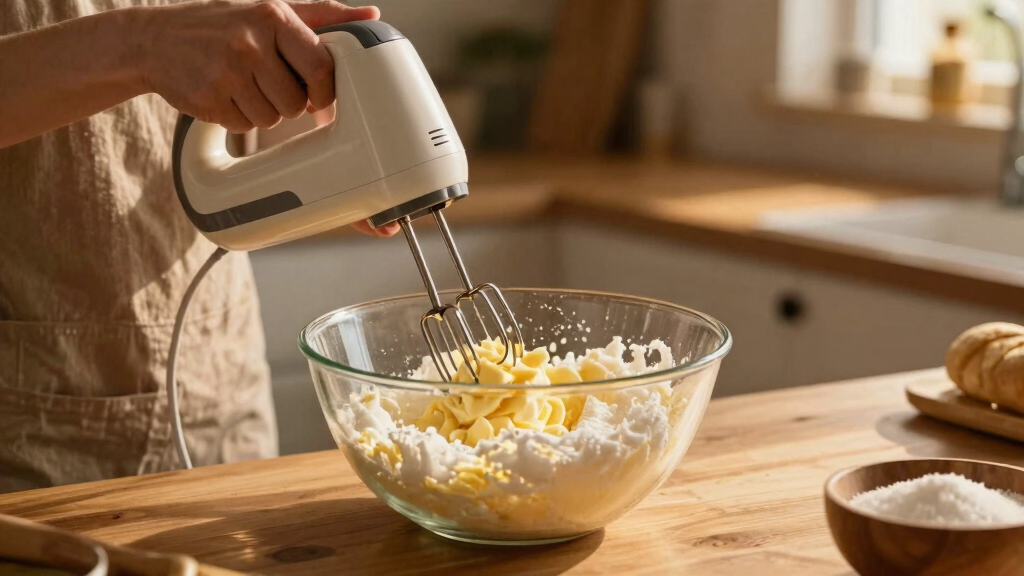
Today’s baking tools make creaming easier and more reliable. An electric stand mixer with a paddle attachment is the gold standard for consistent aeration. If you don’t have one, a handheld mixer works too—but keep it steady.
Here are some tips:
- Use a mixer on medium speed—not too fast, not too slow. Too fast can cause splattering and uneven aeration, while too slow may not incorporate enough air efficiently.
- Scrape down the bowl often to ensure even mixing, preventing pockets of unmixed butter or sugar that could affect the texture.
- Make sure your butter is at room temperature — soft but not melted. Cold butter resists aeration, and melted butter can cause a greasy mixture that doesn’t trap air well.
- Set a timer for 3-5 minutes, then visually check your mixture. Relying solely on time can be misleading; visual cues are more accurate for optimal aeration.
Some bakers also use a kitchen scale to measure butter precisely, ensuring consistency in texture and temperature. Remember, the goal is a smooth, fluffy, pale mixture that looks almost whipped, which indicates maximum aeration without overworking the fat.
Frequently Asked Questions
How do I tell if my butter and sugar are creamed enough?
Look for a pale, fluffy mixture that has doubled in volume and holds soft peaks when lifted. It should feel light and smooth, not greasy or grainy.
Can I stop creaming if I see some sugar still visible?
Ideally, no. Small sugar granules can dissolve during baking, but if you stop too early, you won’t trap enough air. Keep beating until the mixture is uniform and fluffy.
What happens if I over-cream butter and sugar?
Over-creaming is rarely a problem for most baked goods. It can sometimes cause a very airy, fragile dough that might collapse. But generally, it’s better to slightly over- than under-cream.
Is manual creaming effective?
It’s possible but takes much longer and requires more effort. An electric mixer makes the process more consistent and less tiring, especially for larger batches.
Why does my butter need to be at room temperature?
Cold butter won’t trap air effectively, leading to dense baked goods. Warm, soft butter mixes smoothly and aerates more easily, creating that fluffy texture essential for light baking.
Conclusion
Mastering the art of creaming butter and sugar isn’t about rushing—it’s about patience and attention to detail. When you let the mixture reach that perfect, fluffy stage, your baked goods will rise with a tender crumb and melt-in-your-mouth texture.
Next time you bake, give yourself those extra few minutes. The difference it makes is worth every second—your taste buds will thank you.