
TL;DR
Making doughnuts at home is simple when you focus on the dough’s consistency, proper proofing, and precise cooking temperatures. Fried doughnuts offer classic texture, while baked versions are cleaner and quicker. Both methods can yield delicious treats with the right technique.
Nothing beats the smell of fresh doughnuts filling your kitchen—the warm, sweet aroma that makes your mouth water. Yet, making doughnuts at home often feels intimidating, especially without professional equipment. The good news? With a few simple techniques, you can craft your own doughnuts, fried or baked, that rival bakery favorites.
This guide breaks down the process into manageable steps, whether you crave the crispy exterior of fried doughnuts or the tender crumb of baked ones. You’ll learn how to handle the dough, control the temperature, and finish with toppings that make every bite memorable. Ready to turn your kitchen into a doughnut shop? Let’s get started.
Controlling dough consistency, proofing, and temperature is more important than equipment for perfect doughnuts.
Frying at 175–185°C (350–365°F) ensures a crispy exterior without raw centers—use a thermometer for accuracy.
Yeast doughnuts require two proofings—first after kneading, second after shaping—for optimal rise and texture.
Baked doughnuts are quicker and cleaner but lack the crispy crust; they’re best when you want a soft, tender treat.
Proper finishing, like glazing while warm or tossing in cinnamon sugar, dramatically enhances flavor and appearance.
Pick the perfect doughnut style for your mood and tools
Choosing between yeast-raised and cake doughnuts sets the stage for your entire batch. Yeast doughnuts are light, airy, and slightly chewy—ideal for classic glazed or filled varieties. They require proofing, which adds to the process but delivers that traditional doughnut texture you love.
In contrast, cake doughnuts are denser, with a crumb closer to muffins or quick bread. They rely on baking powder or baking soda for lift, so no proofing is needed. These are perfect if you want a quicker treat or prefer a sturdier dough that holds thicker glazes or toppings.
Think about your time, equipment, and what flavor or texture you desire. If you’re after that springy, fluffy bite, go yeast. For a quick, tender snack, cake doughnuts are your friend.
digital kitchen thermometer for frying
As an affiliate, we earn on qualifying purchases.
As an affiliate, we earn on qualifying purchases.
Fried or baked? Decide how your doughnuts will turn out
Fried doughnuts are the classic choice—crisp outside, tender inside, with that irresistible aroma and flavor. They require hot oil, careful temperature control, and a bit of cleanup. Fried doughnuts are closer to what you find in shops, with a satisfying crunch and richer taste. The oil’s temperature is critical; too low and they become greasy, too high and they risk burning on the outside before cooking through, resulting in a raw center. This balance influences the final texture and flavor, making precise control essential.
Baked doughnuts, on the other hand, offer a cleaner, less greasy option. They bake in a pan at around 175–190°C (350–375°F), producing a soft, cake-like texture. They’re quicker, less messy, and perfect for mornings when you want a sweet treat without the fuss. However, the tradeoff is a different mouthfeel—baked doughnuts lack the crispy exterior and the complex flavor development that frying provides, which can make them seem less authentic but more convenient.
Air-fried doughnuts are a middle ground—less oil, more convenience, but a texture that’s lighter than fried. Consider your priorities: classic flavor or convenience and health?
| Method | Texture & Flavor | Advantages | Drawbacks |
|---|---|---|---|
| Fried | Crisp exterior, moist interior | Authentic flavor, best rise | Requires oil, temperature control, cleanup |
| Baked | Soft, cake-like, tender | Faster, cleaner, less oil | Less traditional flavor, denser |
| Air-fried | Lightly crisp outside | Less oil, easy cleanup | Less even browning, less rich |
As an affiliate, we earn on qualifying purchases.
Key ingredients for fluffy, flavorful doughnuts
Gathering the right ingredients makes all the difference. All-purpose flour is your base—aim for a balance that gives structure without heavy dryness. Excess flour leads to dense, dry doughnuts. Use instant yeast for quick mixing, or active dry yeast that needs dissolving in warm water (around 38°C or 100°F).
Milk adds tenderness and browning, while eggs contribute richness and color. Butter or shortening tenderizes and enriches, with butter lending a richer flavor. Sugar not only sweetens but helps with browning and tenderness—just don’t go overboard, or it can slow fermentation.
Salt enhances flavor and balances sweetness. For leavening, cake doughnuts rely on baking powder or baking soda, which must be fresh for proper lift. Small amounts of nutmeg, vanilla, or other flavorings add that bakery-style aroma.
Keep ingredients at room temperature unless the recipe states otherwise. This ensures even mixing and consistent results.
As an affiliate, we earn on qualifying purchases.
How to handle dough and proof it right every time
Proper dough handling is key to fluffy doughnuts. Yeast dough should feel soft, slightly tacky, not sticky or dry. When kneading, add flour gradually—too much will toughen the dough, too little leaves it sticky.
Once kneaded, let the dough rise in a warm spot until it doubles in size—usually 1 to 2 hours. During this time, it develops that airy structure you want. For the second proof after shaping, wait until the dough is puffed and jiggly. Under-proofed dough bounces back quickly; over-proofed might collapse or look wrinkled.
Visual cues matter more than clock time. When gently pressed, a properly proofed dough should leave a slight indentation that slowly bounces back. This ensures the dough has developed enough gluten structure for a light, airy crumb.
Tip: Chill yeast dough overnight in the fridge for better flavor and easier handling. It also helps control rising time, especially in warmer kitchens. This slow fermentation develops more complex flavors and improves dough extensibility, leading to a better final texture.
As an affiliate, we earn on qualifying purchases.
Shape doughnuts like a pro with simple techniques
Shaping doughnuts can be straightforward with the right approach. For rings, roll the dough evenly to about 1.2–1.5 cm thick. Use a doughnut cutter or two round cutters—one large, one small—to punch out rings or holes.
Press straight down without twisting to prevent sealing the edges, which can inhibit proper expansion during frying or baking. Reroll scraps once; overworking toughens the dough and can lead to a denser final product. For filled doughnuts, cut out solid rounds, fry, then poke a small hole or cut a slit to fill with jam or custard later. This method ensures the filling stays inside and the dough remains tender.
Filling doughnuts after frying or baking keeps the insides fresh and prevents sogginess. Use a pastry syringe or injector to fill the doughnuts for a perfect, mess-free finish. Keep fillings refrigerated if they contain dairy or eggs. Proper shaping and filling techniques help maintain the doughnut’s structure and enhance overall quality.
Master the art of frying: heat, timing, and safety tips
Frying is both art and science. Use a neutral oil with a high smoke point—canola, vegetable, sunflower, or peanut oil work well. A heavy-bottomed pot helps maintain even heat. A thermometer is your best friend, keeping oil between 175–185°C (350–365°F). This temperature range ensures the doughnuts develop a golden exterior while cooking through to the center, preventing sogginess or burning. Maintaining a stable temperature is crucial because fluctuations can cause uneven cooking and affect texture.
Too cool, and doughnuts soak up oil, becoming greasy and heavy. Too hot, and they burn on the outside before the inside is cooked, leading to a bitter flavor and unappealing texture. Adjust the heat as needed to keep the oil steady, and fry no more than 2-3 doughnuts at a time to prevent temperature drops. Proper turning ensures even browning, and draining on a wire rack helps maintain crispness. Never leave hot oil unattended, and always handle it with care to prevent accidents.
Understanding frying temperature and timing is crucial because it directly impacts the final texture and appearance of your doughnuts. If oil is too hot, doughnuts will brown quickly on the outside but remain raw inside, leading to a greasy, undercooked center. Too cool, and they absorb excess oil, becoming soggy and heavy. Mastering this balance ensures a light, crisp exterior and a fully cooked interior, which is the hallmark of good fried doughnuts. Developing a feel for the process through practice will help you achieve consistent, professional results.
Bake your doughnuts to perfection—tips for fluffy results
Baking doughnuts is a convenient alternative, especially if you lack a deep fryer. Use a greased doughnut pan, filling each cavity about two-thirds full. Bake at 175–190°C (350–375°F) and check for doneness when tops spring back and a toothpick comes out clean. Baking produces a different texture—more tender and cake-like—lacking the crispy crust of fried doughnuts. To enhance flavor, consider brushing the tops with melted butter before baking, which also helps toppings adhere better. Keep in mind that overbaking dries out the doughnuts quickly; start checking around the 10-minute mark and remove when they are golden and a toothpick inserted in the center comes out clean. Achieving fluffy, evenly baked doughnuts requires attention to oven temperature and timing, as they can dry out if left too long.
Finish your doughnuts with irresistible glazes and toppings
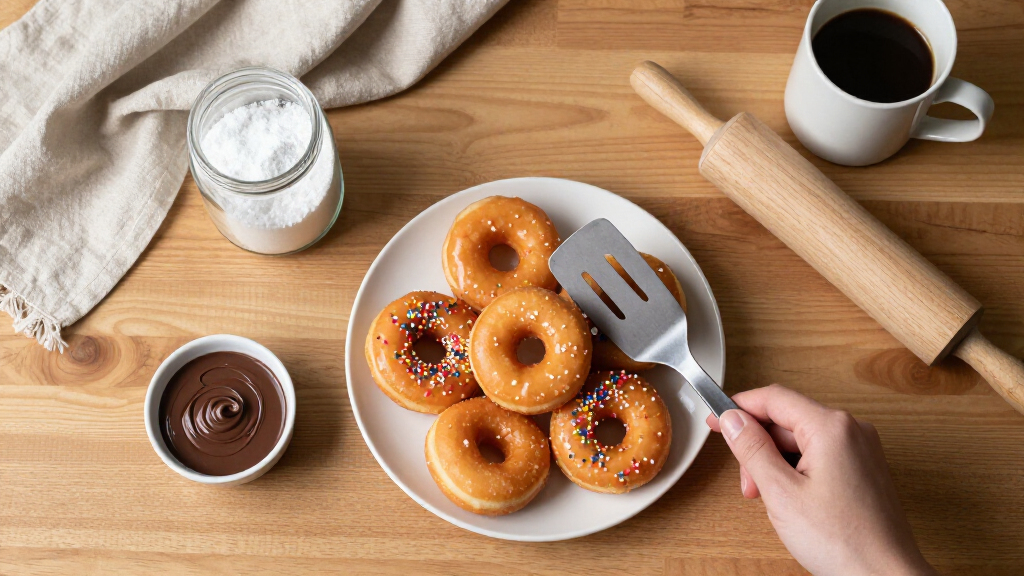
The right coating elevates your homemade doughnuts. For a shiny glaze, dip warm doughnuts into slightly cooled, but still warm, icing so it sets smoothly. Thick icing should be cooled before spreading or piping. Cinnamon sugar is easiest to toss onto fried doughnuts while still warm and oily, so the coating adheres better and creates a flavorful, sticky layer. Powdered sugar is best after cooling, as heat can cause it to melt or slide off. Chocolate glaze works best if doughnuts are cool enough not to melt the chocolate, but still warm enough to allow a smooth finish. Fillings like jam, custard, or lemon curd are added after frying or baking. Use a pastry syringe or injector to fill the doughnuts for a perfect, mess-free finish. Keep fillings refrigerated if they contain dairy or eggs. Adding toppings like sprinkles, chopped nuts, or shredded coconut can enhance both appearance and flavor. Applying these immediately after glazing or while the glaze is still tacky helps them adhere better and creates an attractive, professional look, making your doughnuts not only delicious but visually appealing.
Store and make ahead without sacrificing freshness
Enjoy your doughnuts within a day for the best texture. Fried yeast doughnuts tend to soften and stale quickly, so store them in an airtight container at room temperature for 24–48 hours. For filled doughnuts with perishable fillings, refrigerate and consume within 1–2 days. Unfilled baked or fried doughnuts can be frozen—wrap tightly in plastic, then in foil. Thaw at room temperature and warm briefly in the oven or microwave. Yeast dough can be chilled overnight in the fridge for easier shaping and better flavor development. This slow fermentation not only enhances flavor but also improves gluten structure, resulting in a lighter, more tender doughnut. Reheating slightly restores softness, but freshly made doughnuts are always the best. Proper storage helps maintain the doughnuts’ texture and flavor, ensuring they stay enjoyable even days after baking or frying.
Frequently Asked Questions
What is the main difference between yeast doughnuts and cake doughnuts?
Yeast doughnuts are light, airy, and slightly chewy, relying on yeast for rise, while cake doughnuts are denser, with a crumb similar to muffins, using baking powder or soda as leaveners.Are baked doughnuts healthier than fried doughnuts?
Baked doughnuts generally contain less fat and calories due to the absence of frying oil, making them a lighter alternative. However, both can be enjoyed in moderation as part of a balanced diet.Can I bake traditional fried doughnut dough instead of frying?
Yes, you can bake doughnut dough, but expect a different texture—more cake-like and tender. Baking simplifies the process but won’t replicate the crispy exterior of fried doughnuts.What oil is best for frying doughnuts?
Choose oils with high smoke points like canola, vegetable, sunflower, or peanut oil. These oils withstand high temperatures without breaking down or imparting off-flavors.How do I tell if my frying oil is at the right temperature?
Use a deep-fry thermometer to keep the oil between 175–185°C (350–365°F). If you don’t have one, drop in a small piece of dough—if it sizzles and browns in about a minute, the oil is ready.Conclusion
Making doughnuts at home isn’t just about following a recipe—it’s about understanding your dough and controlling the heat. Whether fried or baked, the secret lies in patience and attention to detail. With a little practice, you’ll turn your kitchen into a bakery, serving up warm, fragrant treats that beat store-bought any day.
So, grab your ingredients, set your timer, and start shaping your perfect doughnuts. The smell alone will make every effort worthwhile—and your taste buds will thank you.