
TL;DR
Listen free for 30 days with Audible
Thousands of audiobooks and originals — cancel anytime.
Start your free trialAs an affiliate, we earn on qualifying purchases.
You can convert almost any bread recipe to sourdough by replacing some or all of the yeast with active starter, adjusting flour and water, and watching fermentation signs. The key is to keep the dough’s balance and be patient with timing.
Imagine transforming your favorite loaf—be it a crusty baguette or soft sandwich bread—into a tangy, naturally leavened masterpiece. It’s not magic; it’s science, and a bit of patience. Converting any recipe to sourdough isn’t about replacing ingredients blindly; it’s about understanding how each element interacts during fermentation.
Whether you’re after a deeper flavor, better digestibility, or just the satisfaction of baking with wild yeast, this guide will walk you through the practical steps. No hype, no complicated formulas—just straightforward techniques you can trust in your kitchen.
Always subtract the flour and water contained in your starter from your recipe to keep the dough balanced.
Judge fermentation readiness by visual cues—rise, bubbles, and texture—not just time on the clock.
Adjust fermentation temperature and time based on your environment to control sourness and proofing speed.
Enriched doughs need a longer, slower fermentation—consider extra starter and colder temps for flavor.
Use a reliable, active starter for consistent results; discard is great for flavor but less predictable for leavening.
Practical conversion guide · wild fermentation
How to Convert Any Recipe to Sourdough
Replace commercial yeast with active starter, rebalance the flour and liquid, then let the dough—not the clock—tell you when fermentation is complete. The result is deeper flavor, natural leavening, and a method you can adapt to almost any bake.
01 · Preserve the balance
Master the core conversion formula
For a 100% hydration starter, half its weight is flour and half is water. Subtract both contributions from the original ingredients before adding the starter.
Standard loaf
Naturally leavened loaf
02 · Account for every variable
Six controls that shape the conversion
No universal starter quantity replaces one packet of yeast. Dough temperature, enrichment, hydration, flour choice, salt, and starter vitality all change the pace.
Use it at peak activity
A fed, bubbly starter gives the most reliable rise. Discard is better for flavor than predictable leavening.
Know what is inside
A stiff starter contributes more flour; a liquid starter contributes more water. Calculate both before mixing.
Control the speed
Warm dough ferments faster. Cool dough buys time and can deepen flavor, but refrigeration does not stop fermentation instantly.
Keep the structure
Maintain 1.8–2.2% of total flour weight. Salt strengthens gluten and moderates microbial activity.
Expect a slower rise
Sugar, eggs, butter, and milk slow fermentation. Strong starter and a longer proof help enriched doughs succeed.
Count more than water
Milk, buttermilk, eggs, and butter add water. Oil does not. Reduce the recipe liquid to avoid an unexpectedly loose dough.
Starter hydration changes the math
The equal-subtraction shortcut works only at 100% hydration. Use the general formula for every other starter.
flour = starter ÷ (1 + hydration ratio) water = starter − flour03 · Ferment by evidence
Replace fixed rising times with a visual chain
Starter strength and room conditions vary from day to day. Use the recipe’s timing as a planning estimate, then make the decision from the dough’s expansion, bubbles, texture, and movement.
Mix
Combine the rebalanced ingredients and develop enough structure for the dough type.
Track
Mark the starting level and monitor temperature, surface texture, and visible gas.
Read
Look for roughly 30–75% expansion, aeration, elasticity, and a gentle jiggle.
Shape
Proceed when the dough is lively and structured—before it becomes slack or overproofed.
Readiness cues
Useful lean-dough zone
24–27°CA practical range for predictable fermentation. Cooler conditions need more time; warmer conditions demand closer observation.
04 · Match the method to the bake
What converts easily—and what needs special care
“Any recipe” does not mean “one rule.” Lean breads adapt readily, while sweet, chemically leavened, low-moisture, and gluten-free formulas require different expectations.
| Recipe type | Conversion fit | Starter approach | Main adjustment | Watch closely |
|---|---|---|---|---|
| Baguette / ciabatta | ✓ Excellent | Active starter | Rebalance flour and water | Bulk rise and dough strength |
| Pizza / focaccia | ✓ Excellent | Active starter | Use a long, cool ferment | Acidity and extensibility |
| Brioche / challah | ~ Moderate | Strong, active starter | Allow a longer warm fermentation | Sugar and fat slow the rise |
| Cakes / muffins | ~ Specialized | Often discard | Balance acidity and chemical leavener | Crumb texture and pH |
| Cookies | ~ Flavor use | Discard | Reduce other liquid | Spread and dough softness |
| Gluten-free bread | ✗ Not direct | Specialized starter | Add dedicated structure builders | Binding and gas retention |
✓ direct fit · ~ adapt carefully · ✗ requires a specialized method
Choose starter quantity by schedule
Percentages below use total starter weight relative to total recipe flour. More starter generally speeds fermentation but can increase acidity and narrow the proofing window.
05 · The reliable-bake checklist
Five rules to carry into every conversion
Consistency comes from balancing the formula, measuring the environment, and recording what the dough actually does.
Subtract starter flour and water
Count both contributions so the original hydration and dough texture remain recognizable.
Use active starter for the rise
Save discard for flavor-led applications unless it is demonstrably strong and lively.
Judge the dough, not the clock
Track expansion, bubbles, elasticity, and movement instead of expecting a fixed duration.
Measure temperature
A few degrees can shift fermentation by hours, especially in enriched or highly hydrated doughs.
Record the result
Note starter percentage, dough temperature, rise, and timing to make the next bake reproducible.
Use a hybrid method when needed
A small amount of commercial yeast can improve schedule reliability while starter still adds flavor.
The conversion logic, end to end
Master the Basic Conversion Formula to Keep Your Dough Balanced
When converting a recipe to sourdough, the goal is to replace commercial yeast with active starter while maintaining the original flour-to-liquid ratio. For a 100% hydration starter, the math is simple. For example, if your recipe calls for 500 g of flour and 300 g of water, and you add 100 g of starter, you need to subtract the flour and water contained in that starter.
With 100 g of a 100% hydration starter, it contains 50 g flour and 50 g water. So, you reduce your recipe by those amounts: 450 g flour, 250 g water, and add 100 g of starter. This keeps your dough’s texture familiar, but now it ferments naturally.
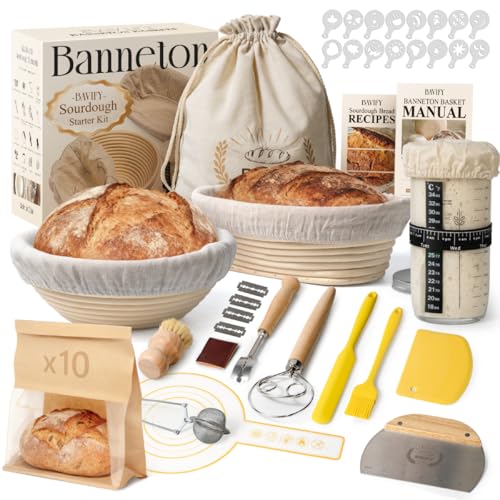
BAVIFY Sourdough Starter Kit, Banneton Bread Proofing Baskets Set
- Complete Sourdough Baking Kit: Includes tools for every baking step
- Premium Natural Rattan Baskets: Made from 100% Indonesian natural rattan
- Chemical-Free and Safe: Free from dyes and chemicals
As an affiliate, we earn on qualifying purchases.
As an affiliate, we earn on qualifying purchases.
Adjust for Hydration and Ingredient Variations—Know Your Starter’s Type
Not all starters are created equal. A stiff starter contains more flour relative to water, while a liquid starter is wetter. To convert accurately, you need to know the hydration level of your starter. For example, 100 g of a 50% hydration starter has about 66.7 g flour and 33.3 g water.
If you’re using a stiff starter at 60% hydration, the math changes. You’ll subtract more flour and less water from your original recipe. This precision prevents doughs from becoming too dry or sticky and ensures your bread’s texture stays just right.

ABIOTO Sourdough Bread Baking Kit – 17-Piece Artisan Set with 10" Round & 11" Oval Rattan Baskets, Slings, Baking Mat, Bread Lame, Danish Whisk & Scrapers
- Complete Artisan Baking Kit: 17-piece set with baskets and tools
- Two Baskets for Different Shapes: 9-inch round and 10-inch oval bannetons
- Effortless Loaf Transfers: Includes slings for easy handling
As an affiliate, we earn on qualifying purchases.
As an affiliate, we earn on qualifying purchases.
Reading Fermentation Signs: When Is Your Dough Ready?
Fermentation time varies with temperature, starter strength, and dough composition. Instead of clock-watching, look for visual cues. Well-fermented dough will expand by about 30–75%, develop bubbles along the sides and surface, and feel elastic and light when poked.
Imagine your dough gently jiggling in the bowl—like a Jell-O jiggle—indicating it’s ready to shape. If it’s overly sticky or has no rise, it needs more time or a warmer environment. Patience here is your best friend.
As an affiliate, we earn on qualifying purchases.
How Temperature Controls Fermentation—Make It Work for You
Warmth speeds up fermentation; cool slows it down. For most sourdough, aim for a dough temperature of around 24–27°C. If your kitchen runs cooler, your dough might need an extra hour or two. If it’s warm, watch for overproofing.
Think of your dough as a slow-cooking stew—temperature is the heat that determines how fast it cooks. A simple trick? Use a thermometer or proofing box to keep conditions steady, especially when baking on a tight schedule.
fermentation thermometer for bread
As an affiliate, we earn on qualifying purchases.
As an affiliate, we earn on qualifying purchases.
Converting Different Types of Recipes—Know What Works
Not every recipe converts the same way. Lean, crusty breads like baguettes or ciabatta are easiest. Enriched breads—like brioche or challah—need more starter and longer fermentation. Quick breads and muffins rely more on chemical leaveners, but a splash of sourdough adds flavor.
For example, a cinnamon roll dough with butter and sugar ferments more slowly. Adding a small amount of commercial yeast can boost reliability if time is tight, but the sourdough flavor will be milder.
Handle Enriched Doughs and Sweet Breads Without Overdoing It
Enriched doughs like brioche or cinnamon rolls often ferment slowly because fats, eggs, and sugar slow down yeast activity. When converting, consider increasing starter percentage or fermenting at warmer temps. You might also opt for a longer cold proof to develop flavor.
For instance, a brioche dough with 50 g of sugar per 500 g flour benefits from a slightly higher starter amount and a longer, slower fermentation in the fridge—sometimes overnight—to coax flavor and structure.
Dealing with Acid and Flavour: How Much Sourdough Is Too Much?
Sourdough acidity influences flavor, gluten strength, and browning. Using more starter speeds fermentation but can lead to a tangy, sometimes harsh flavor. Less starter means milder sourness but longer fermentation.
Imagine adding lemon juice to a recipe—balance is key. Adjust the starter amount and fermentation time based on your flavor preference. Longer, cooler fermentations develop sourness gradually without compromising dough strength.
Keep Salt in Check—Why It Matters When Converting
Salt doesn’t just flavor bread; it controls fermentation and supports gluten. When converting recipes, don’t cut back on salt just because you’re using sourdough. Maintain 1.8–2.2% of total flour weight for best results.
If your dough feels slack or overly sticky, check salt levels. Proper salt helps keep dough manageable and ensures your bread has that satisfying chew.
Account for All Liquids—Milk, Eggs, and Fats Count Too
Liquid isn’t just water. Milk, buttermilk, eggs, and even butter contain water that affects dough hydration. When converting, reduce water or milk accordingly. For example, if a recipe calls for 200 g milk and you add sourdough starter, subtract some milk to keep the dough from becoming too loose.
Remember, fats like butter contribute some water but oil does not. Adjust your liquids to keep the dough manageable and avoid sticky surprises.
Using Active Starter vs. Discard—When and Why
An active starter is fed and bubbly, perfect for leavening. Discard is unfed or past-peak starter, mostly used for flavor. When converting, aim to use active starter for reliable rise, but discard can add complexity if it’s lively enough.
For example, mixing discard into a pancake batter adds tang and depth, but won’t produce a full rise like active starter. Keep this distinction in mind when planning your bake.
Avoid Common Pitfalls in Sourdough Conversion
Don’t forget to subtract flour and water from your recipe when adding starter. Never treat the starter as just extra yeast. Rushing fermentation times or expecting the dough to double every time can lead to dense, flat bread.
Temperature mismanagement and overfeeding your starter are traps, too. Always judge by how the dough looks and feels, not just the clock.
Trends and Tips for Reproducible Sourdough Baking
Modern sourdough baking focuses on formulas and precise fermentation control. Use baker’s percentages, measure dough temperature, and track rise progress visually. If you keep these habits, your sourdough will be more consistent and predictable.
For example, aim for a dough temperature of 25°C, and look for a 30–50% rise before shaping. It’s about understanding your dough, not just timing.
Frequently Asked Questions
How much starter replaces one packet of yeast?
There’s no exact match, but roughly 100–150 g of active starter per 500 g of flour is a good starting point. Factors like temperature and schedule matter more than a direct conversion. Adjust based on how your dough ferments.
Do I subtract flour and water when adding starter?
Yes. For a 100% hydration starter, subtract half the weight of the starter from the flour and the other half from the water. This keeps your dough’s hydration balanced and predictable.
Can I use discard instead of active starter?
Yes, but it depends. Discard adds flavor and some leavening if active, but it’s less reliable. For bread that needs a good rise, use a freshly fed, bubbly starter. Discard works best in recipes where rise isn’t critical, like pancakes or crackers.
Should the dough double during fermentation?
Not always. Many sourdoughs are shaped before doubling. Look for signs like bubbles, volume increase of 30–75%, and a light, elastic feel. Rely on how the dough looks and feels, not just the clock.
How long will the converted recipe take?
It varies with temperature, starter strength, and dough size. Expect several hours or overnight. Focus on visual cues—rise, bubbles, and texture—rather than timing alone.
Conclusion
Converting your favorite recipes to sourdough isn’t about magic; it’s about understanding the dough’s language. With a little math, patience, and attention to signs, you can turn almost any bread into a tangy, nourishing masterpiece.
Remember: every loaf is a conversation between ingredients and time. Trust your senses, keep experimenting, and soon, sourdough will become your most dependable baking partner.
Back to school Picks
back to school
As an affiliate, we earn on qualifying purchases.