TL;DR

Get baking supplies delivered free — and shop member deals
- Fast, free delivery on millions of items
- Access to Prime Big Deal Days deals on October 6–7
- Prime Video, Amazon Music and more included
Filling a piping bag without mess is about preparation, the right tools, and technique. Use a tall glass, avoid overfilling, and work on a stable surface to keep it tidy and stress-free.
Imagine this: You’re all set to pipe beautiful rosettes or intricate details, but the filling spills over, and your workspace turns into a sticky mess. Sound familiar? Filling a piping bag can be tricky — if you don’t do it right, it’s easy to end up with gooey hands, wasted filling, and a frustrating cleanup. But with a few smart tricks, you can turn this messy job into a quick, tidy task.
This guide shares practical, step-by-step techniques to help you fill your piping bag without the fuss. Whether you’re decorating cupcakes, making cookies, or fancying up a cake, good filling habits save time and keep your kitchen cleaner. Ready to ditch the mess and pipe like a pro? Let’s get started.
Use a tall glass or piping bag holder to keep the bag open and upright during filling.
Avoid overfilling; fill only about two-thirds to prevent spills and make piping smoother.
Work on a tray or in a bowl to catch drips and keep your workspace clean.
Choose accessories like funnel attachments or wide-mouthed holders to make filling cleaner and faster.
Clean your piping bag immediately after use with warm water and gentle scrubbing to prolong its life.
Prepare Your Workspace and Tools for a Clean Fill
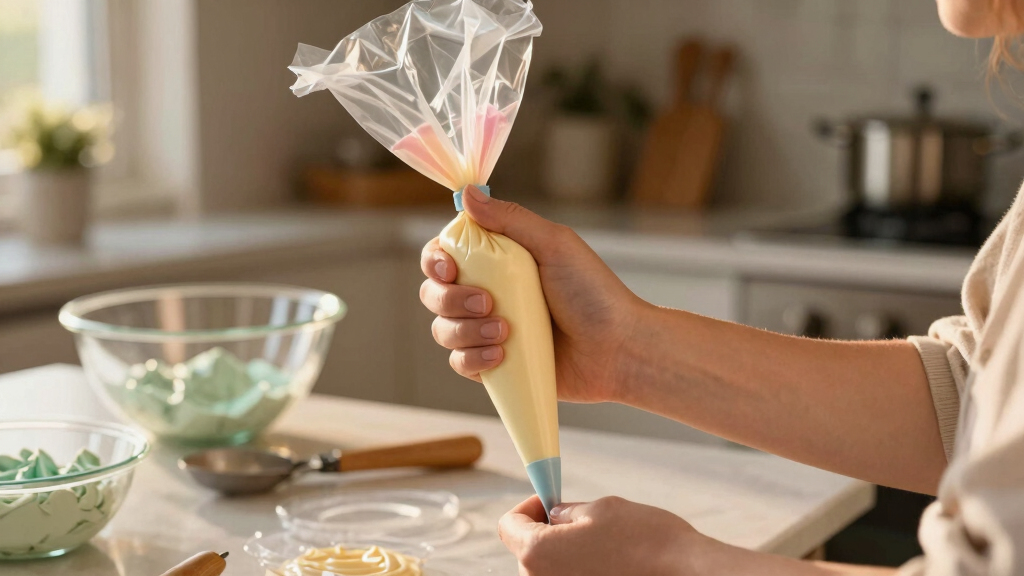
The first step to a mess-free piping bag fill is setting up your workspace with care. Clear a sturdy, flat surface, and gather all your tools: a high-quality piping bag, tips, a spatula or scraper, and a tall glass or piping bag holder. Using a tall glass keeps the bag open wide, making it easier to load without spilling.
Imagine trying to pour paint into a small funnel versus a wide-mouthed jar — the wider opening makes all the difference. Similarly, a tall glass or specialized stand holds your piping bag upright, giving you a clear, spill-proof way to load your filling. If you’re working with soft fillings, chilling them beforehand helps keep everything neat and manageable.
As an affiliate, we earn on qualifying purchases.
Step-by-Step: How to Fill a Piping Bag Without Spills
- Loosen the top of the piping bag. Twist or unclip the top to create an opening wide enough for your spatula or scoop.
- Place the bag in a tall glass or holder. Keep the opening upright and open, ready for filling.
- Use a spatula or scraper to transfer the filling. Gently scoop or push the filling into the bag, avoiding overfilling. Filling it about 2/3 full gives you room to pipe without spilling over.
- Twist or fold the top of the bag to secure the contents. This keeps everything inside when you start piping.
Filling the bag about two-thirds full is a deliberate choice that balances ease of piping with reducing mess. Overfilling increases the chance of spilling, especially when you apply pressure, and can make control difficult. Underfilling, on the other hand, may require more frequent refills, which can be time-consuming and increase the risk of accidental spills during multiple transfers. By filling it approximately 2/3, you create a manageable amount of filling that allows for smooth, controlled piping, minimizing mess and waste. This balance is crucial for professional-looking results and efficiency in your decorating process.
As an affiliate, we earn on qualifying purchases.
Tips to Minimize Spills and Keep Things Tidy
- Use parchment paper or a piping bag coupler. These tools help contain the filling during transfer, reducing the chances of leaks and drips that can cause messes. Parchment paper can also be folded into a cone shape for easy transfer, which minimizes contact and spillage. Choosing the right transfer tools reduces the likelihood of accidental drips that can spread across your workspace, making cleanup easier and keeping your decorations pristine.
- Work on a tray or in a bowl. Catching drips or overflow on a tray or bowl isn’t just about tidiness; it also prevents cross-contamination and makes cleanup easier. When working with colorful or sticky fillings, this practice prevents staining your work surface and simplifies post-decorating cleanup. It also allows you to contain any accidental overflows, reducing the risk of spreading messes across your countertop or table.
- Wear an apron or cover your clothing. Soft fillings like ganache or buttercream can splash unexpectedly, especially if you’re in a hurry or handling soft textures. An apron acts as a barrier, protecting your clothes and reducing the need for extra cleaning afterward. This protective layer also minimizes the risk of transferring sticky residues to your clothes, which can be difficult to remove later.
- Fill the bag in small batches. Overstuffed bags are prone to spilling and make piping more difficult. Refill as needed, which allows better control and reduces the risk of accidental messes. This practice also helps maintain the integrity of delicate fillings that can break or ooze if overfilled, ensuring cleaner piping and less waste. Filling in stages allows you to focus on precision, and it’s easier to handle soft or fragile fillings when they are kept at optimal consistency.
Think of it like filling a paintbrush — less is more, and patience keeps the workspace spotless. If you’re piping delicate decorations, these small habits make a big difference in achieving neat, professional results while keeping your work area clean and organized.
As an affiliate, we earn on qualifying purchases.
Compare Filling Tools and Accessories: What’s Worth the Investment?
| Tool or Accessory | Benefit | Drawback |
|---|---|---|
| Funnel attachment | Speeds up filling, reduces drips | Requires an extra piece, may be an extra cost |
| Reusable silicone piping bag | Eco-friendly, flexible, easy to clean | Less rigid, might be harder to handle for some |
| Wide-mouthed piping bag holder | Keeps bag open and stable, prevents spills | Additional equipment, takes up space |
Choosing the right tools can turn a messy job into a quick, tidy task. A sturdy stand or funnel reduces spills significantly — especially when working with soft or runny fillings. Investing in these tools can save time and frustration, and they often pay for themselves by reducing waste and cleanup time. While the initial cost may seem higher, the long-term benefits include cleaner work, more consistent results, and less stress during decorating sessions. The tradeoff involves extra space and a small upfront investment, but the efficiency gains and cleaner workspace make it worthwhile for serious bakers and decorators.
As an affiliate, we earn on qualifying purchases.
How to Clean Your Piping Bag Fast and Easy
Cleaning your piping bag promptly prevents stubborn stains and keeps it ready for the next use. Turn the bag inside out and rinse with warm water immediately after use. Use a gentle brush or sponge to remove any residual filling, especially if it’s buttercream or chocolate ganache. For silicone bags, a quick soak in warm, soapy water for 10 minutes loosens hardened bits and makes cleaning easier. Proper drying is crucial—air-drying or towel-drying thoroughly prevents mold and preserves flexibility. Neglecting proper cleaning can lead to lingering odors, hardened residues, and a shorter lifespan for your piping bag. Regular maintenance not only extends the life of your tools but also ensures your decorations stay hygienic and beautiful.
What Soft Fillings Are Easier to Fill and Pipe Neatly?
Soft fillings like whipped cream, ganache, or softened buttercream can be tricky — they tend to ooze and spill, especially if not handled carefully. Chilling these fillings for 15-20 minutes before filling firms them up, making them less likely to ooze out uncontrollably. This step is crucial because it directly impacts the precision and cleanliness of your piping. Warm, soft fillings are more prone to oozing at the slightest pressure, which can cause uncontrolled spreading and messes. By chilling, you increase the filling’s viscosity, giving you better control and reducing accidental spills. This extra step in preparation not only ensures neater decorations but also minimizes cleanup time and frustration, helping you achieve professional-looking results with less effort.
Frequently Asked Questions
How do I prevent my piping bag from leaking during filling?
Ensure the bag’s top is twisted or fastened tightly after filling. Using a coupler or sealing clip can also help keep fillings secure during piping.What’s the best way to fill a piping bag without making a mess?
Use a tall glass to hold the bag open, fill with a spatula or scoop, and avoid overfilling. Working on a tray helps catch drips, keeping your workspace tidy.Can I fill a piping bag ahead of time and store it?
Yes, but keep it in a sealed container or covered with plastic wrap in the fridge. Pipe from the bag directly to avoid mess during use. Chilling soft fillings helps maintain neatness.What tools or accessories make filling easier?
Funnel attachments, wide-mouthed holders, and reusable silicone bags are excellent investments. They reduce spills, speed up the process, and are eco-friendly.How should I clean my piping bag after use?
Turn the bag inside out, rinse with warm water, and scrub gently with a soft brush or sponge. For silicone bags, a soak in soapy water helps loosen hardened bits. Dry thoroughly to prevent mold.Conclusion
Filling a piping bag without mess isn’t about luck — it’s about preparation, patience, and the right tools. When you set up thoughtfully, fill carefully, and clean promptly, you turn a potentially messy task into a quick, satisfying part of decorating.
Next time you’re about to pipe, remember: a little prep and the right approach make all the difference. Your beautifully decorated treats will thank you — and so will your clean kitchen!
Fall Picks
fall essentials
As an affiliate, we earn on qualifying purchases.