
TL;DR
A perfect meringue stays glossy, crisp, and firm without leaking or collapsing. Achieving this requires careful whipping, proper ingredients, low-temperature baking, and controlling humidity. Follow these tips to get it right every time.
Use fresh, cold egg whites and whip to soft peaks before adding sugar.
Add stabilizers like cream of tartar or lemon juice to strengthen the foam.
Incorporate sugar gradually to ensure complete dissolution and stability.
Bake at low temperatures (225°F–250°F) and dry thoroughly for crispness.
Store in a dry, airtight container to prevent moisture absorption and weeping.
Kitchen science / foam stability guide
How to Make a Meringue That Doesn’t Weep or Collapse
A perfect meringue is glossy, crisp and firm—not gritty, sticky or sunken. The secret is a strong protein foam, completely dissolved sugar, gentle heat and ruthless control of moisture.
The reliable sequence
Five moves from liquid whites to a stable shell
Each stage protects the air-and-protein network. Skip one, and moisture or heat can expose a weak point.
Prepare
Use a spotless, grease-free bowl. Separate cold eggs carefully—one trace of yolk can suppress the foam.
Foam
Whip the whites alone until soft peaks form and the bubbles become fine and even.
Stabilize
Add cream of tartar, lemon juice or vinegar to strengthen the unfolding protein network.
Sweeten
Add superfine sugar one tablespoon at a time. Keep whipping until no grit remains.
Dry
Bake low and slow, then cool in the switched-off oven with the door slightly ajar.
Technique that matters

Fox Run Stainless Steel Manual Hand Mixer, White Retro Style Egg Beater, 10" x 5"
CLASSIC SLEEK DESIGN: The smooth stainless steel beaters, white handle, gears and hand crank on this manual egg…
As an affiliate, we earn on qualifying purchases.
As an affiliate, we earn on qualifying purchases.
Build strength without squeezing out moisture
The ideal foam is dense, smooth and shiny. Both under-whipping and over-whipping undermine it.
Begin cold and fresh
Cold whites create a dense starting foam; fresh proteins tend to form a durable structure. Refrigerate separated whites for at least 30 minutes.
Zero yolk • zero greaseChoose superfine
Caster sugar dissolves quickly and evenly. Coarse crystals can leave gritty, syrup-forming pockets that later leak through the meringue.
Add graduallyStrengthen the network
Acid helps prevent egg proteins from bonding too tightly, allowing the foam to stay flexible while holding its trapped air.
⅛ tsp per whiteStop at glossy stiff peaks
Lift the whisk: the peak should stand tall with a slight curl. If the foam looks dry, clumpy or dull, it has gone too far.
Tall • moist • shinyDry with gentle heat
Use 225–250°F. High heat sets the outside before the center dries, encouraging browning, cracks and structural collapse.
110–120°CSeal out humidity
Cool completely, then use an airtight container in a dry place. On humid days, extend the oven-drying stage before storage.
Cool before sealingPeak control + stability profile

Badia Cream of Tartar, 2 Pounds – Premium Baking Stabilizer & Leavening Agent – Ideal for Fluffy Meringues, Perfect Baked Goods
Premium Baking Stabilizer for Perfect Texture: A must-have ingredient for bakers, helping to stabilize egg whites, enhance the…
As an affiliate, we earn on qualifying purchases.
As an affiliate, we earn on qualifying purchases.
The sweet spot is firm, glossy and still flexible
Sugar and acid support the foam, but neither can fully rescue whites that were stopped too early or whipped until dry.
Read the whisk
Relative stability profile
Stabilizer comparison

0.5 Sec Instant Read Meat Thermometer Digital with ±0.5℉ Precision, Food Thermometer for Cooking Kitchen Gadgets, Oven Grill Candy BBQ Essentials Accessories, Gifts for Him Dad Men Birthday, Red
【8X Faster + 4X More Precise】: Upgraded with an industrial-leading professional thermocouple sensor, Themomonster meat thermometer digital with…
As an affiliate, we earn on qualifying purchases.
As an affiliate, we earn on qualifying purchases.
Choose support for the texture you want
Classic acid stabilizers strengthen foam. Cornstarch manages free moisture, while glucose favors a softer, shinier result.
| Stabilizer | Primary effect | Best use | Foam strength | Moisture control |
|---|---|---|---|---|
| Cream of tartar | Acidifies and reinforces the protein foam | Reliable all-purpose meringues and pavlova | ✓Strong | ✓Good |
| Lemon juice | Provides natural acidity and added flexibility | Accessible alternative to cream of tartar | ✓Good | ~Moderate |
| Cornstarch | Absorbs residual moisture inside the foam | Dry shells, crisp cookies and humid conditions | ~Supportive | ✓Strong |
| Glucose / invert sugar | Retains moisture and adds shine | Soft, chewy or glossy meringue styles | ~Moderate | ✗Not for crispness |
Troubleshooting matrix

Angadona Macaron Silicone Baking Mats Kit (16pcs set) Macaroon Baking Mat Set of 2 Half Sheet Macaron Silicone Mat Nonstick Macaron Mat Sheet,6 Piping Tip,2 Piping Bag with 3 Bag Tie,2 coupler
Macaron Silicone Baking Mats Kit (16pcs set) Macaroon Baking Mat Set of 2 Half Sheet Macaron Silicone Mat…
As an affiliate, we earn on qualifying purchases.
As an affiliate, we earn on qualifying purchases.
What the failure is telling you
Appearance is evidence. Match the symptom to the most likely breakdown in preparation, whipping, heat or storage.
Weeping or beads
- Sugar was added too quickly or remained undissolved.
- The foam was under-whipped before baking.
- Humidity rehydrated the finished meringue.
- The center was not dried thoroughly.
Collapse or sinking
- Whites were whipped until dry and fragile.
- The oven temperature changed too rapidly.
- The shell set before the interior dried.
- The foam lacked enough acid or dissolved sugar.
Cracks or browning
- The oven was hotter than 250°F / 120°C.
- Hot spots caused uneven expansion and drying.
- Cooling happened too quickly outside the oven.
- The meringue was overbaked rather than dried.
Traceability chain
Every good choice protects the next stage
A stable finished meringue is the result of a connected system—not a single trick.
The final test: dry, crisp and cleanly released
Tap the shell—it should sound crisp. The surface should feel dry, and the meringue should lift without sticky residue. Cool completely, then seal it in an airtight container away from humidity. If conditions are damp, give it extra drying time before storage.
Start with fresh, cold egg whites for the best foam
Fresh, cold egg whites whip into a more stable foam that’s less prone to weeping. Cold whites trap less air initially, but once whipped, they create a dense, glossy foam that holds its shape. For example, if you’re making meringue for a pavlova, crack your eggs and refrigerate whites for at least 30 minutes before whipping. Better yet, try whipping whites straight from the fridge and see how they perform. Fresh whites tend to whip faster and produce a more durable foam than older eggs.
Choose the right sugar — superfine is your friend
Superfine or caster sugar dissolves more quickly and evenly into egg whites, creating a smoother, more stable meringue. When sugar dissolves completely, it strengthens the foam and reduces liquid pockets that cause weeping. Adding sugar gradually while whipping allows the sugar to incorporate fully, resulting in a more cohesive structure. This uniformity means fewer weak points where moisture can escape, which is essential for preventing weeping. Avoid coarse sugar because it dissolves slowly and can leave gritty spots, creating weak areas in the meringue that are more susceptible to collapse or weeping during baking or storage.
Add a splash of acid to keep your meringue stable
Adding about 1/8 teaspoon of cream of tartar or a few drops of lemon juice per egg white helps stabilize the proteins, making the foam more resistant to weeping and collapse. Acidic ingredients modify the protein structure in egg whites, strengthening their network and increasing their capacity to hold air. This results in a more stable foam that can withstand the stresses of baking and humid conditions. For example, a pinch of cream of tartar creates a firmer, glossier meringue that maintains its shape longer, even in humid environments. Without this acid, the foam can weaken over time, leading to collapse or weeping, especially if the meringue is stored or baked improperly.
Whip egg whites to soft, then stiff peaks — don’t overdo it
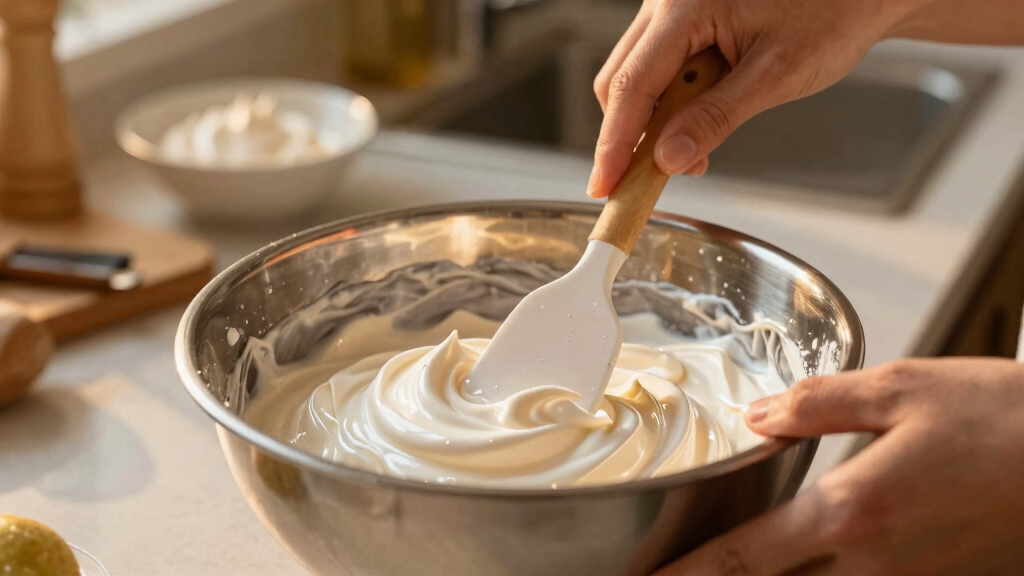
Whip until soft peaks form, then add sugar gradually and continue until stiff, glossy peaks appear. Over-whipping dries out the whites, breaking down the foam’s delicate structure and making it prone to collapse later. Under-whipping results in a weak, unstable foam that cannot support its shape or resist moisture. Think of it like beating a sponge — stop when the peaks are firm enough to stand upright but still shiny and moist. A good test: lift the whisk, and the peak should stand tall with a slight curl at the tip. Achieving this balance ensures the foam is strong enough to hold its shape during baking and storage, reducing the risk of weeping and collapse.
Incorporate sugar slowly for maximum stability
Adding sugar one tablespoon at a time while whipping ensures it dissolves completely, creating a dense, glossy foam. This gradual addition allows the egg whites to fully incorporate the sugar, forming a uniform, stable matrix. Rushing this step leaves undissolved sugar pockets, which weaken the foam’s structure and increase the likelihood of weeping or collapse during baking and storage. Think of it like adding sugar to hot tea — slow and steady, it dissolves evenly, preventing gritty spots and weak points. This careful process results in a meringue that remains firm and shiny, with a crisp exterior and a stable interior, even after cooling.
Bake low and slow — perfect temperature is key
Baking at 225°F to 250°F (110°C to 120°C) dries out the meringue gently, which is critical for preventing cracks and collapse. Higher temperatures cause rapid moisture loss, leading to uneven drying, cracking, or collapsing of the meringue. For example, baking at 250°F for an hour allows moisture to escape gradually, resulting in a crisp shell that holds its shape and resists weeping. Conversely, higher heat can cause the outer layer to crack before the inside is fully dried, compromising stability. Using a convection oven helps distribute heat evenly, reducing hot spots that might cause uneven drying. The goal is to dry out the meringue slowly enough to maintain structural integrity, which is why temperature control is so crucial.
Dry your meringue thoroughly before storing
Proper drying is essential for long-term stability. A fully dried meringue feels firm and sounds crisp when tapped. If it’s under-dried, it can absorb moisture from the air, becoming sticky or collapsing over time. To ensure thorough drying, leave your baked meringue in a turned-off oven with the door slightly ajar for 1-2 hours, allowing residual moisture to escape slowly. Once cooled completely, store the meringue in an airtight container in a dry, cool place. This prevents humidity from compromising its structure, reducing the risk of weeping or collapse during storage. Proper drying and storage are key to maintaining crispness and stability over several days.
Modern stabilizers and environmental tips
Adding a pinch of cornstarch (about 1/2 teaspoon per egg white) can help absorb excess moisture, creating a more stable and shiny meringue. Cornstarch acts like a moisture barrier, preventing the formation of a sticky surface or weeping during storage. Environmental factors such as humidity are a meringue’s enemy because moisture in the air can rehydrate the dried meringue, leading to a soggy texture or collapse. On humid days, consider extending the drying time or slightly increasing baking temperature to ensure complete moisture removal. Using an oven with precise temperature control minimizes the risk of overbaking or browning, which can also compromise stability. Being mindful of these factors helps produce a consistently stable meringue regardless of external conditions.
Compare common stabilizers — what works best?
| Stabilizer | Effect | Best Use |
|---|---|---|
| Cream of tartar | Increases foam stability by up to 50% | Standard, effective stabilizer that enhances the protein network, making it more resistant to humidity and overwhipping, leading to longer-lasting stability during baking and storage. |
| Lemon juice | Natural acid that stabilizes | Natural alternative to cream of tartar, providing acidity that strengthens the egg white foam but may be less potent, requiring slightly more for similar stability. |
| Cornstarch | Absorbs moisture, prevents weeping | Dry, crisp meringues. It helps absorb residual moisture within the meringue structure, reducing the risk of weeping during storage, especially in humid environments. |
| Inverted sugar or glucose | Retains moisture, adds shine | Moist, chewy meringues. These sugars help retain some moisture, preventing brittleness, but may reduce crispness if used excessively. |