TL;DR
A flaky pie crust that shatters just right depends on cold fats, minimal handling, and high baking heat. Resting the dough and using the right fats help layer and crisp the crust perfectly.
Who doesn’t love that first bite of a flaky, crisp pie crust? The kind that shatters with a satisfying crunch, revealing tender, buttery layers inside. Achieving that perfect texture isn’t just about the ingredients—it’s about technique, temperature, and a little patience.
In this guide, you’ll learn the concrete steps to craft a crust that’s flaky, tender, and just the right amount of crisp—without fuss or guesswork. Whether you’re baking a classic apple pie or a savory quiche, these tips will elevate your crust game and make every slice a moment to savor.
Use cold fats and handle the dough as little as possible to build distinct, flaky layers.
Rest the dough in the fridge for at least 30 minutes to relax gluten and set fats.
Bake at high heat (~425°F) with preheated equipment for crisp, shattering crusts.
Incorporate acids like vinegar or lemon juice to tenderize the dough and boost flakiness.
Freezing the crust briefly before baking helps maintain layers and prevents shrinking.
Why Cold Fat and Minimal Handling Are Your Secret Weapons
The secret to a flaky crust lies in creating layers of fat that puff up during baking. Cold butter or shortening stays in small, solid pieces—like tiny building blocks—ready to melt and release steam when heated. This steam pushes apart the layers, giving you that light, shattering texture.
Handle the dough just enough to come together. Overmixing or kneading warms the fat, causing it to blend into the flour and lose its ability to create those distinct layers. Think of it as building a layered cake—gentle folds, not heavy squeezing. If you overwork the dough, the fats melt prematurely and integrate fully into the flour, resulting in a denser, less layered crust that lacks the desired crispness.
- Use ice-cold fats straight from the fridge.
- Cut in fats quickly with a pastry cutter or fingers, aiming for coarse crumbs with visible pea-sized pieces.
- Work swiftly to keep everything cold and prevent melting, which is crucial because warmth causes fats to soften and lose their layered effect, ultimately diminishing the crust’s shattering quality.

ALLTOP Pastry Shortening Blender Cutter,Stainless Steel Dough Masher for Butter, Biscuit,Baking, Kneading,Dough, Flakier and Fluffier Pie Crusts, Almond – Hand Kitchen Tool (1, Black)
- Durable Metal Blades: High-quality, long-lasting blades
- Enhanced Baking Results: Creates flakier, fluffier baked goods
- Versatile Kitchen Tool: Ideal for butter, dough, and pastry mixing
As an affiliate, we earn on qualifying purchases.
As an affiliate, we earn on qualifying purchases.
How to Handle and Mix Your Dough for Perfect Layers
Handling the dough lightly isn’t just about ease—it directly impacts the structural integrity of your crust. Proper mixing techniques influence how the layers form and how well they hold during baking. Overmixing or excessive kneading generates frictional heat, which can cause the fats to melt prematurely, collapsing the delicate layers that give the crust its shattering quality. Gentle handling preserves these pockets of fat, which expand into steam during baking, creating the characteristic crisp layers.
- Combine flour, salt, and optional sugar in a bowl, ensuring even distribution for consistent texture.
- Add cold fats and cut in until the mixture resembles coarse crumbs with visible chunks—this variation in size is vital because it creates the pockets of fat that form layers.
- Sprinkle ice water gradually, mixing gently with a fork until the dough just begins to hold together. Overhydrating or overmixing develops gluten, which makes the crust tough and less likely to shatter. Controlled hydration ensures the dough remains tender and flaky.
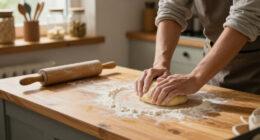
- Turn the dough onto a floured surface and press into a flat disk. Avoid kneading or overworking, as this activates gluten and can lead to a dense, less flaky crust. The goal is to keep the dough tender and layered, not elastic.
- Wrap tightly and refrigerate for at least 30 minutes. Resting not only relaxes gluten but solidifies fats, which are essential for creating those distinct, puffed layers that shatter upon biting.
This chilling process is critical—it allows the fats to firm up, which helps maintain their layered pockets during baking. Proper handling ensures these layers stay intact and puff up to produce that desirable crackling, flaky texture.

Pastry Cutter Tool – Heavy Duty Stainless Steel Pastry Blender, Comfortable Handle, Dishwasher Safe, Perfect Flaky Pie Crust & Biscuits – Turquoise
- Perfect Flaky Pie Crust: Effortlessly blend butter into flour
- Comfortable Non-Slip Handle: Provides a firm grip for easy use
- Durable Stainless Steel Blades: Serrated edges for versatile baking tasks
As an affiliate, we earn on qualifying purchases.
As an affiliate, we earn on qualifying purchases.
What Ingredients Make or Break Your Flaky Crust
The right ingredients are simple—flour, fat, water, and a pinch of salt—but their quality and temperature matter profoundly. Using cold butter creates rich flavor and flaky layers because the cold fat remains solid during mixing, which is essential for layering. If butter is warm or melted, it blends into the flour, reducing the distinct layers and resulting in a denser, less crisp crust. Shortening can add tenderness but lacks the flavor complexity of butter; combining both can balance flavor and flakiness, but the key is keeping fats cold.
Recent tweaks include adding a splash of vinegar or lemon juice. These acids tenderize the dough by weakening gluten bonds, which prevents toughness and allows the crust to shatter more easily. They also help maintain a tender crumb even when handling the dough minimally. Experimenting with different flours—such as pastry or cake flour—can produce a lighter, more delicate crust, but always ensure they are properly measured and kept cold to preserve their properties.
| Ingredient | Impact | Tip |
|---|---|---|
| Cold butter | Creates flaky layers by remaining solid during mixing, enabling steam pockets to form during baking. | Cut into flour quickly, keep cold, and handle minimally to preserve layers. |
| Ice water | Binds dough without activating gluten excessively, maintaining tenderness and flakiness. | Add gradually, just enough to bring dough together without overhydrating. |
| Vinegar or lemon juice | Tenderizes dough by weakening gluten bonds, enhancing flakiness and shattering ability. | Use a teaspoon per batch for a subtle effect that improves texture. |
high heat oven thermometer for baking
As an affiliate, we earn on qualifying purchases.
As an affiliate, we earn on qualifying purchases.
Baking Tricks to Make Your Pie Crust Shatter Perfectly
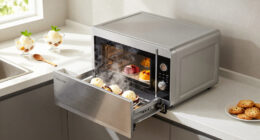
High heat is your friend—around 425°F (220°C)—to generate steam quickly and promote rapid puffing of the layers. Preheating your oven and baking surface ensures an immediate blast of heat that helps set the layers before they have a chance to soften or collapse, which is vital for achieving that signature shatter.
For extra crunch, consider blind baking with pie weights if your crust is prone to sogginess, especially with wet fillings. This method helps the crust hold its shape and develop a crisp, crackling surface. Additionally, a quick freeze before baking solidifies the fats and sets the layers, preventing shrinkage and ensuring a uniform, flaky structure. The combination of high heat, preheated equipment, and proper baking techniques produces the crisp, crackling crust that shatters with each bite, showcasing the layered perfection you aimed for.
Imagine pulling a pie out of the oven—crisp, golden, with a crackling sound as you slice into it. That’s the goal.
As an affiliate, we earn on qualifying purchases.
Recent Tips to Elevate Your Flaky Pie Crust
New tricks are emerging all the time. Incorporating a small amount of vinegar or lemon juice tenderizes the dough by weakening gluten bonds, which enhances flakiness and the shattering effect. Using a combination of fats—like butter and shortening—can give you a balance of flavor and crispiness, but the key is to keep fats cold and handle the dough minimally to preserve the layered structure. Laminating the dough—folding it multiple times like puff pastry—creates ultra-thin, crisp layers, but requires patience and precise folding to avoid overworking the dough. Freezing the dough briefly before baking helps lock in the layers, prevents shrinkage, and enhances the crust’s cracking, crispy character. These techniques, combined with proper handling and baking at high heat, will elevate your pie crust to bakery-quality levels.
Why Resting the Dough Is a Game-Changer
Resting your dough for at least 30 minutes in the fridge is more than a pause—it’s a crucial step that influences the final texture. Resting relaxes the gluten network, preventing the dough from shrinking or pulling away during rolling and baking. It also allows the fats to solidify, which is essential for creating those distinct, flaky layers that puff up during baking. When fats are cold and solid, they form pockets that create steam, pushing apart the layers and resulting in that characteristic shattering crunch. Skipping this step can lead to a tougher, less flaky crust, as gluten remains active and fats may melt prematurely, collapsing the layers. Think of it as giving the dough a little nap so it’s ready to perform at its best—baking a rested dough ensures even crispness and a beautiful, crackling crust that shatters with each bite.
Frequently Asked Questions
How do I prevent my pie crust from shrinking or shrinking during baking?
Rest the dough thoroughly in the fridge, handle it gently, and avoid overworking it. Using enough ice water and chilling the dough before baking also helps maintain its shape and prevent shrinkage.
Can I make flaky pie crust gluten-free?
Yes, but it requires specific gluten-free flours and binders like xanthan gum. Gluten-free dough can be more fragile, so handle it carefully and keep it cold for best flakiness.
What is the best fat to use for a flaky crust?
Butter offers rich flavor and flaky layers, while shortening provides tenderness and stability. A combination of both often yields the best balance of flakiness and flavor.
How do I get my crust to shatter just right?
Use cold ingredients, minimal handling, and bake at high heat. Freezing before baking helps set the layers, making your crust crisp and crackling with every bite.
Can I prepare the crust in advance?
Absolutely. The dough can be made ahead, wrapped tightly, and refrigerated for up to 2 days or frozen for longer storage. Just bring it back to room temperature before rolling out.
Conclusion
Perfectly flaky pie crust that shatters just right isn’t magic—it’s science and technique working together. Keep fats cold, handle gently, and bake hot. With practice, your pies will crackle with crispness and melt-in-your-mouth tenderness, impressing everyone at the table.
Remember, every crust is a little different. Don’t be afraid to experiment with fats and resting times—your signature flaky crust is waiting to be discovered. Now, get baking and enjoy that satisfying crack with every slice.