
TL;DR
Whip egg whites to stiff peaks by starting with clean, grease-free bowls at room temperature. Use stabilizers like cream of tartar, add sugar gradually, and check often. Proper technique makes all the difference.
Always start with clean, grease-free bowls and equipment to prevent whites from failing to foam.
Let whites sit at room temperature for 20–30 minutes before whipping for maximum volume.
Add stabilizers like cream of tartar early to help whites hold their peaks longer.
Gradually incorporate sugar once soft peaks form, avoiding adding it too early.
Stop whipping immediately once peaks are stiff, glossy, and stand straight up — overbeating ruins the structure.
How to Whip Egg Whites to Stiff Peaks Every Time
Glossy, airy clouds that hold their shape like sculpture aren’t magic — they’re technique. Clean bowls, room temperature, the right stabilizer, and knowing exactly when to stop. Master it once, and pavlova, mousse, and meringue never fail you again.
“Egg whites whip to their fullest volume in a metal or glass bowl — plastic retains a greasy film that quietly kills the foam.”
Five Rules That Decide Your Peaks
Most failures happen before the mixer even starts. Get these right and stiff, glossy peaks become the default outcome.
Spotless, grease-free equipment
Even a trace of yolk, oil, or residue stops foaming. Use stainless steel, glass, or copper — never plastic.
Room-temperature whites
Separate eggs cold (cleaner splits), then let whites sit 20–30 minutes. Warm whites whip faster and taller.
Acid in at the foamy stage
⅛ tsp cream of tartar per white lowers pH and builds a finer, more resilient protein network.
Slow sugar, only after soft peaks
Add superfine sugar 1 tbsp at a time. Too early and you choke the foam before it forms.
Stop the second peaks stand straight
Glossy, upright tips — done. Overbeating tightens proteins until they break and weep.
Grainy whites can be saved
Gently fold in one fresh white and re-whip briefly. Fully broken-down whites, though, must go.
The Five Stages, In Order
You fail egg whites mostly by not recognizing the moment. Here’s the full arc — and where to stop.
Foamy
Low/medium speed. Small bubbles form — the protein network starts trapping air.
Soft Peaks
Tips curl over when you lift the beater. Add acid earlier; start sugar now.
Firm Peaks
Shape holds with a slight droop. Keep beating — but start checking every few seconds.
Stiff Peaks
Glossy, smooth, tips stand straight. Bowl can tilt without sliding. STOP HERE.
Overbeaten
Dull, grainy clumps that weep liquid. Structure broken — rubbery results.
Timing warning: stiff peaks can arrive in under a minute after soft peaks. Patience and attention — not more speed — are what save the batch.
Pick the Right Mixer, and the Right Bowl
Every tool changes how much control you have over foam development. The bowl material changes whether foam develops at all.
| Tool | Pros | Cons | Overbeating Risk |
|---|---|---|---|
| Stand mixer | Fast, consistent, hands-free — easiest for large batches | Needs space and a power outlet; easy to walk away too long | ✗ HIGH — check every 15 sec |
| Hand mixer | Good control, portable, feel the foam develop | Less stable base; speed creep is common | ~ MEDIUM — watch speed |
| Whisk by hand | Full control, gentle touch — excellent for small batches | Several minutes of real effort; tiring for big volumes | ✓ LOW — hardest to ruin |
Whatever you use: beaters and whisks must be perfectly clean and dry. Carton/pasteurized whites whip, but foam slower and less reliably than fresh.
The Doneness Spectrum
Where your foam sits right now — and where to stop.
The usable window is narrow: glossy and upright, never dull or curdled. High humidity makes meringues sticky — many bakers skip rainy days.
What Went Wrong — and the Fix
Flat, runny, or grainy whites always have a cause. Diagnose it fast and save the batch.
Yolk contamination or greasy bowl
The single most common cause. Even a speck of fat blocks foaming. Separate each egg into a small bowl first before adding to the batch.
Cold whites, rushed start
Cold whites whip less voluminously, and jumping to high speed makes big, unstable bubbles. Rest 20–30 min; start low, then go medium-high.
Overbeaten structure
Proteins tightened until they broke apart. Fold in one fresh white and briefly re-whip — it often smooths out. Beyond that, discard.
Sugar added too early or too coarse
Early sugar interferes with foam formation. Wait for soft peaks, use superfine sugar, 1 tbsp at a time until fully dissolved.
Add acid at the foamy stage
Cream of tartar (⅛ tsp per white), lemon juice, or white vinegar lowers pH so proteins form a finer, stronger network — no flavor change at this dose.
Fresh vs. older: both work
Older whites whip faster and loftier but less stable; very fresh whip slower but steadier. Technique matters more than the date on the carton.
“Perfect peaks aren’t about strength or speed — they’re about recognition. Know what stiff looks like, and stop.”
- Meringues & pavlova: stiff, sugared peaks hold crisp shells.
- Soufflés & mousses: stable foam folds in without deflating.
- Angel food & chiffon: whipped whites are the entire leavening.
- Macarons & soufflé pancakes: viral trends built on this exact skill.
- No eggs? Aquafaba (chickpea liquid) whips to stiff peaks the same way.
From Egg to Showstopper
Start with the right eggs and prep — here’s what you need to know
Egg whites whip best when they’re at room temperature. Cold whites are easier to separate but whip less voluminously. Allow whites to sit out for 20-30 minutes before whipping for optimal results. Use fresh eggs, but note that slightly older whites tend to whip up faster and taller, though they may be less stable. Always separate whites into a small bowl first to check for yolk contamination, which can sink your peaks. Use a clean, grease-free bowl—preferably stainless steel or glass—since even a tiny trace of yolk or grease can sabotage your effort. Plastic bowls are discouraged because they trap oils and residue, making foaming difficult. For an added boost, a copper bowl can chemically stabilize the whites, leading to even more reliable peaks.
stainless steel mixing bowls for egg whites
As an affiliate, we earn on qualifying purchases.
As an affiliate, we earn on qualifying purchases.
How to whip egg whites step-by-step — from foam to stiff peaks
- Separate each egg carefully into a small bowl, checking for any yolk.
- Place whites in a clean, dry bowl. Let sit at room temperature if possible.
- Start beating on low or medium speed until whites turn foamy and small bubbles form. This initial stage is crucial because it begins the protein network that traps air, forming the foundation of stable peaks. Rushing past this stage or increasing speed too early can result in inconsistent foam and less volume.
- Add 1/8 teaspoon of cream of tartar or a splash of lemon juice to stabilize the foam. This acid helps proteins unfold and trap air more effectively, leading to finer, more stable bubbles that support taller peaks.
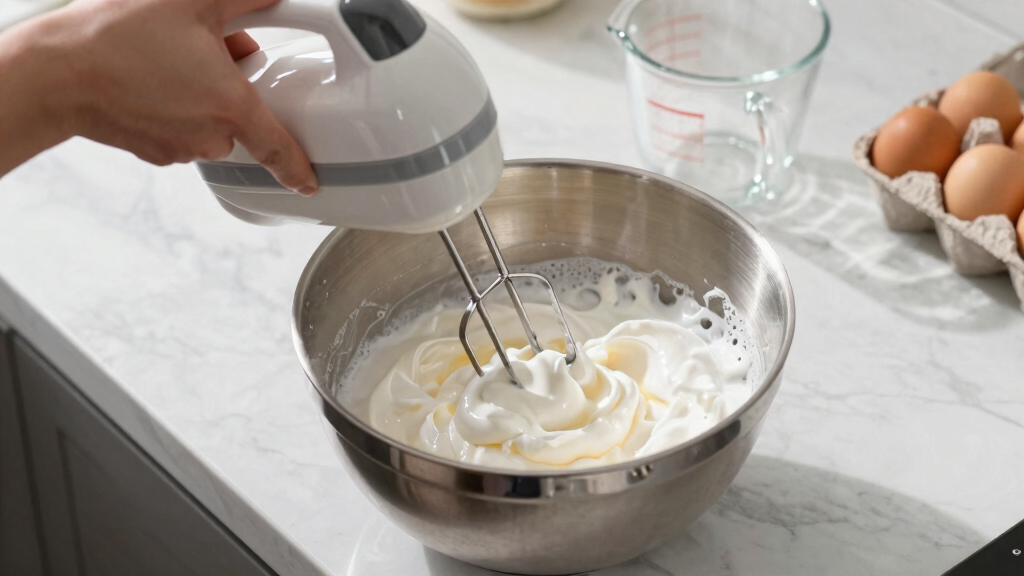
- Increase to medium-high speed. Watch for the first soft peaks — tips curl over when you lift the beater. Recognizing soft peaks indicates the foam has developed enough structure to hold some shape but still needs to be whipped further for firmness.
- Gradually add superfine sugar, about 1 tablespoon at a time, once soft peaks form. Continue beating until glossy and firm peaks appear — tips stand straight up without curling or drooping. The sugar dissolves into the foam, strengthening the structure and increasing stability, which is essential for recipes like meringues that require crispness and volume.
This step-by-step method ensures gradual development of structure, so your peaks are stable and shiny. Check frequently after soft peaks — stiff peaks arrive quickly, sometimes in less than a minute once you see the soft stage. Patience and attention are key.

Amazon Grocery, Cream of Tartar, 5 Oz
- Product Size: 5 oz container of Cream of Tartar
- Usage in Baking: Whip into egg whites for light desserts
- Key Baking Properties: Anti-caking, anti-crystallizing, thickening
As an affiliate, we earn on qualifying purchases.
As an affiliate, we earn on qualifying purchases.
How to recognize and troubleshoot stiff peaks — avoid common mistakes
Stiff peaks are the hallmark of perfectly whipped egg whites — glossy, standing tall, and holding their shape when you lift the beaters. They should resemble tiny, firm clouds with a smooth, shiny surface. If your peaks are dull, grainy, or start to weep liquid, it’s a sign you’ve overbeaten or introduced unwanted grease or yolk, which destabilizes the foam. Overbeaten whites become dry and curdled, losing their ability to hold air and resulting in a collapsed or rubbery texture. Recognizing these cues early helps prevent wasted ingredients and effort.
Common pitfalls include yolk contamination, greasy bowls, beating at too high a speed, or rushing the sugar addition. If whites turn grainy, gently fold in a little fresh egg white and briefly re-whip to salvage the foam. For best results, stop once peaks are stiff and shiny — don’t go beyond that point, as overwhipping will cause the proteins to tighten and break apart, leading to collapse or a dry, clumpy texture.
As an affiliate, we earn on qualifying purchases.
Equipment options — what tool makes whipping easier (or harder)
| Tool | Pros | Cons |
|---|---|---|
| Stand mixer | Fast, consistent, hands-free | Requires space and a power outlet |
| Hand mixer | Good control, portable | Less stable, overbeating risk |
| Whisk by hand | Full control, gentle touch | Requires effort, takes longer |
Whipping by hand works surprisingly well — especially for small batches or if you want to feel every stage. A stand mixer is the easiest for larger quantities, but it requires careful attention to speed to avoid overbeating. No matter what, keep the beaters clean and dry for best results. Each tool offers a different level of control and influence on the final texture, so choose based on your comfort and the volume you’re working with. The key is understanding how each impacts the development of foam structure and stability.
As an affiliate, we earn on qualifying purchases.
Why stabilizers like cream of tartar matter — and what else works
Stabilizers like cream of tartar help lower the pH of egg whites, making the foam more stable and less likely to collapse under stress. This acid unfolds the proteins, allowing them to form a finer, more resilient network that traps air more effectively. About 1/8 teaspoon per egg white is enough to significantly improve stability without altering the flavor. Lemon juice or vinegar can be used as substitutes, offering similar acid effects, though their flavor may subtly influence the final dish.
Without stabilizers, egg whites are more prone to weeping or collapsing, especially when making large batches or delicate meringues. Adding stabilizer early in the process—right after the whites turn foamy—ensures the foam develops a robust structure from the start. This prevents early collapse and results in a more reliable, professional-looking finish. The choice of stabilizer can affect the texture and longevity of your peaks, so experimenting with small batches can help you find the best fit for your recipes and preferences.
When and how to add sugar for perfect meringues
Adding sugar at the right time is crucial for achieving glossy, stable peaks. Wait until soft peaks have formed—this is when the foam begins to hold its shape but tips still curl over. Once at this stage, gradually sprinkle superfine or caster sugar, about 1 tablespoon at a time, allowing each addition to fully dissolve before adding the next. This slow incorporation helps create a smooth, shiny, and elastic foam that can support tall peaks. If sugar is added too early, it can interfere with foam formation, resulting in less volume or a grainy texture.
For best results, stop beating once stiff, glossy peaks are achieved. The entire process of adding sugar usually takes an additional 2-3 minutes, depending on your mixer speed. Using superfine sugar ensures quicker dissolution and a more uniform foam, which is essential for achieving the desired stability and sheen. Proper timing and gradual addition prevent the formation of unwanted crystals or a gritty texture, making your meringue perfect for pavlovas, pies, or macarons.
Troubleshooting: my whites collapsed or turned grainy — what now?
If your whites collapse or turn grainy, it usually indicates overbeating or contamination with grease or yolk. Overbeaten whites lose their ability to trap air, becoming dry and clumpy, which leads to collapse once baked or mixed further. To fix minor graininess, gently fold in a splash of fresh, unwhisked egg white and re-whip briefly; this can sometimes restore some of the foam’s structure. However, if the whites are fully broken down—dry, curdled, or greasy—it’s best to start over with a clean bowl and fresh eggs. Always stop whisking once you see firm, glossy peaks to prevent overprocessing.
Preventative measures include ensuring your equipment is spotless, avoiding yolk or grease contamination, and not rushing the process. Using stabilizers and adding sugar gradually also reduce the risk of collapse. Recognizing early signs of overbeating or graininess allows you to salvage your foam or decide to restart before wasting ingredients.
Making perfect peaks by hand — is it possible?
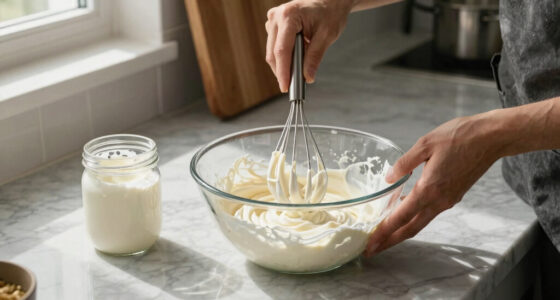
Absolutely. Whisking egg whites by hand requires patience and a good arm, but it offers fine control over the process. Use a large, balloon-style whisk and a steady, rhythmic motion to incorporate air efficiently. Whisk briskly, maintaining consistent speed and pressure, and check frequently for foam development. It typically takes about 5–7 minutes to reach stiff peaks, depending on the whites and your effort. Hand-whisking allows you to feel the texture and stop precisely when peaks are firm and glossy, reducing the risk of overbeating. Although it’s more labor-intensive, many bakers find it rewarding and a great way to connect with the process, especially for small batches or when equipment isn’t available.
Pro tip: keep your arm moving steadily and take breaks to assess the foam’s texture. This hands-on approach enhances your understanding of the stages and helps develop your technique for other baking tasks.
What stiff peaks are used for — and why they matter
Stiff peaks are the foundation of many delicate desserts — from airy meringues and pavlova to soufflés and chiffon cakes. They trap air within the foam, providing the volume and lightness that give these baked goods their signature fluffy texture. Without properly whipped peaks, these recipes can fail to rise or hold their shape, resulting in dense or flat desserts. Achieving perfect peaks ensures your mixture will expand and maintain its structure during baking, creating that cloud-like softness that’s the hallmark of professional-quality desserts.
Imagine a cloud of whipped whites gently supporting a dessert layer or standing tall as a crown — that’s the power of good peaks. Mastering this step not only guarantees a stunning presentation but also influences the final texture and stability of your baked creations, making your baking truly impressive.