TL;DR

Get baking supplies delivered free — and shop member deals
- Fast, free delivery on millions of items
- Access to Prime Big Deal Days deals on October 6–7
- Prime Video, Amazon Music and more included
Making vanilla extract at home involves soaking vanilla beans in alcohol for at least 8 weeks. Use high-quality beans and alcohol, and store in a dark place. The result is a pure, flavorful extract that improves over time.
Choose high-quality Madagascar Bourbon vanilla beans for the best flavor.
Split beans lengthwise to maximize extraction during steeping.
Use at least 8 weeks of steeping time—longer for richer flavor.
Store in dark glass bottles in a cool, dark place to preserve quality.
Experiment with different alcohol bases and flavor infusions for personalized vanilla.
Choose the Best Vanilla Beans for Rich Flavor
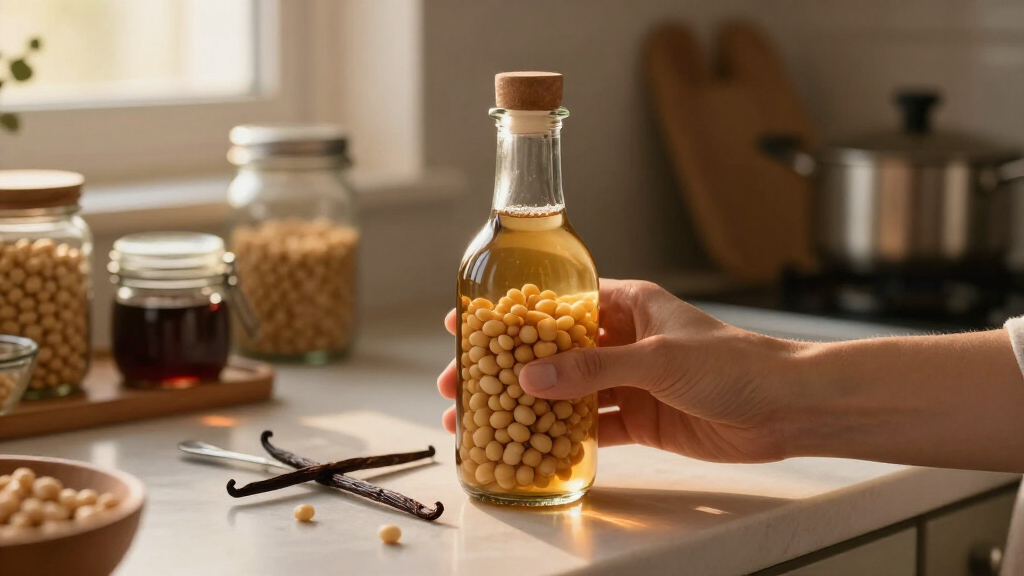
The secret to a stunning homemade vanilla extract lies in the quality of your vanilla beans. High-quality Madagascar Bourbon or Tahitian vanilla beans are the gold standard. They’re plump, fragrant, and soaked with tiny black seeds that burst with flavor. Imagine slicing open a bean and releasing a sweet, floral aroma that instantly transports your senses.
For a vibrant, classic vanilla flavor, 5 to 7 beans per 8 ounces of alcohol is a good rule of thumb. If you want a more intense extract, add more beans or let it steep longer. You can find these beans online or at specialty spice shops. Remember, fresh beans will give you a more potent, aromatic extract than older, dried ones.
Choosing high-quality beans matters because it directly influences the depth and complexity of your final extract. Cheaper beans often lack the intense aroma and flavor that fresh, premium beans provide. The tradeoff is cost—premium beans are pricier, but their richer flavor means you need less to achieve the desired intensity, making it a worthwhile investment in your baking.
As an affiliate, we earn on qualifying purchases.
Step-by-Step: How to Infuse Vanilla in Alcohol
- Start with clean, dry glass jars or bottles. Sterilize them if needed to prevent mold or bacteria.
- Split each vanilla bean lengthwise with a sharp knife, exposing the tiny seeds and increasing flavor extraction.
- Place the beans in the jar, then pour in at least 35% ABV alcohol—vodka works best because of its neutrality.
- Ensure the beans are fully submerged. Seal the jar tightly.
- Store in a cool, dark place, shaking gently every week to help distribute flavors.
- Wait a minimum of 8 weeks. The longer, the better—some prefer 4-6 months for maximum richness.
By following these steps, your vanilla extract will develop its deep, complex aroma and flavor. The process of infusion is not just about soaking beans; it’s about allowing the alcohol to extract and dissolve the complex aromatic compounds within the vanilla beans. Longer steeping times enable more of these compounds to be released, resulting in a richer, more fragrant extract. The tradeoff is patience—waiting longer produces a more nuanced flavor, but it also delays your ability to use the vanilla. Balancing time and flavor intensity depends on your patience and intended use.
high proof vodka for vanilla extract
As an affiliate, we earn on qualifying purchases.
As an affiliate, we earn on qualifying purchases.
How to Store and Know When Your Vanilla Is Ready
Proper storage is key to keeping your vanilla extract fresh and potent. Use dark glass bottles or jars to protect it from light, which can degrade flavor. Keep your extract in a cool, dark cabinet, away from heat and sunlight.
Most homemade vanilla takes about 8 weeks to develop a good flavor, but many bakers prefer waiting 4-6 months for a richer, more complex profile. During this time, shake the jar every week to help the flavors meld. The longer you wait, the more the flavors deepen and the aroma intensifies, resulting in a more sophisticated vanilla extract. The color will deepen to a rich amber, indicating a well-infused extract. Patience here is a tradeoff—while it takes months to reach peak flavor, the resulting extract is notably more complex and aromatic, offering a richer baking experience.
As it ages, you’ll notice the aroma intensify and the color deepen to a rich amber. Your patience pays off with a more vibrant, lively vanilla that adds a special touch to everything from cookies to custards.
glass bottles for vanilla infusion
As an affiliate, we earn on qualifying purchases.
As an affiliate, we earn on qualifying purchases.
Compare Different Alcohol Bases for Unique Flavors
| Type of Alcohol | Flavor Profile | Pros | Cons |
|---|---|---|---|
| Vodka | Neutral, clean, pure vanilla aroma | Most versatile; highlights vanilla | Less complex flavor |
| Bourbon | Rich, caramel, oaky notes | Adds depth and warmth | Altered vanilla flavor; more expensive |
| Rum | Sweet, tropical aroma | Great for tropical and dessert flavors | Can overpower vanilla if used excessively |
Choosing your alcohol base influences the final aroma. For pure vanilla with a neutral profile, vodka is best. For a more layered, warm flavor, bourbon is ideal. Rum adds a sweet, exotic touch—perfect for certain recipes.
Understanding these flavor profiles helps you tailor your vanilla extract to specific recipes or personal preferences. For instance, bourbon’s caramel notes can add warmth to baked goods like bread pudding, while rum’s tropical sweetness pairs beautifully with fruit-based desserts. The tradeoff is in flavor complexity versus neutrality, so consider your intended use and flavor harmony when selecting your base alcohol.
As an affiliate, we earn on qualifying purchases.
Experiment with Vanilla Variations and Additions
Once you master the basic vanilla extract, consider customizing it. Add a cinnamon stick or a few peppercorns during infusion for a subtle spice kick. Or, infuse with other flavorings like orange zest or a splash of coffee liqueur for a unique twist.
Adding spices or other flavorings during infusion allows you to create a more complex, multi-layered vanilla extract. For example, cinnamon adds warmth and a sweet-spicy note, which complements baked goods like cinnamon rolls or apple pies. Orange zest imparts a bright, citrusy aroma that pairs well with desserts or beverages. Coffee liqueur introduces a rich, roasted depth, ideal for coffee-flavored treats. The tradeoff is that these additions can sometimes overshadow the delicate vanilla flavor if used excessively, so start with small amounts and taste as you go to maintain balance. Experimenting with these variations not only enhances your vanilla but also allows you to craft a signature flavor profile that suits your baking style and personal taste.
Reuse Vanilla Beans for Extended Flavor
Don’t toss used vanilla beans after their first steeping. You can reuse them by soaking them in fresh alcohol for another 4-6 weeks. The second infusion will be milder but still flavorful.
Drying out the beans and grinding them into powder is another way to maximize their use. This vanilla powder can be added directly to baked goods or infused into milk or cream for flavoring. This approach allows you to leverage every part of the vanilla bean, reducing waste and extending the value of your initial purchase. Keep in mind that each subsequent infusion or use will yield a less intense flavor, so taste-testing is key to determining when the beans have exhausted their flavor potential. This practice is especially beneficial if you want to develop multiple vanilla-based products or if you’re on a budget, as it stretches your vanilla supply further.
By reusing and repurposing vanilla beans, you gain a deeper understanding of how vanilla’s flavor compounds are extracted and how their intensity diminishes over time. It’s a practical way to enhance your culinary resourcefulness while maintaining high-quality flavor in your baking.
Why Making Vanilla Extract at Home Is Worth It
Homemade vanilla extract isn’t just cheaper in the long run; it’s also more natural. You control the ingredients—no artificial flavorings or additives. Plus, it’s a fun project that fills your kitchen with sweet, intoxicating scents as it infuses.
Many bakers find that homemade vanilla has a richer, more complex flavor than store-bought. It’s like giving your baking a little secret weapon—full of depth and warmth. And, you can customize the flavor with different beans or infusions, making each batch uniquely yours.
Beyond cost and flavor, making vanilla extract at home offers a satisfying sense of craftsmanship. You learn about the process, appreciate the quality of your ingredients, and create a personalized product that elevates your baking. The tradeoff is time—waiting weeks or months—but the result is a superior, handcrafted flavor that store-bought options rarely match.
Remember: Keep it Clean and Safe
Always use sterilized jars and high-proof alcohol to prevent spoilage or mold. Store your vanilla in a cool, dark place, and check periodically for any signs of cloudiness or mold—discard if anything seems off.
Homemade vanilla extract is safe when handled properly. Its shelf life is essentially indefinite, as long as you keep it away from sunlight and heat. Proper storage prevents the growth of bacteria or mold, ensuring your vanilla remains safe and flavorful for years. Regularly inspecting your bottles will help catch any issues early, but typically, if stored correctly, your vanilla will remain good for a very long time, with flavor deepening over time—a small tradeoff for the richness gained.
Frequently Asked Questions
How long does homemade vanilla extract last?
If stored properly in a dark, cool place, homemade vanilla can last indefinitely. Its flavor often even deepens and improves over time, making it a true pantry staple.Can I use different alcohols besides vodka?
Absolutely. Bourbon adds a warm, caramel note, while rum can give a tropical hint. The key is choosing alcohol with at least 35% ABV for proper infusion.How many vanilla beans do I need for a batch?
Typically, 5-7 beans per 8 ounces of alcohol create a rich, well-balanced extract. Adjust based on how strong you want the flavor.When can I start using my vanilla extract?
A minimum of 8 weeks is recommended, but many prefer to wait 4-6 months for maximum depth and aroma.Is homemade vanilla extract safe?
Yes, as long as you use sterilized jars and high-proof alcohol. Proper storage ensures it stays safe and flavorful for years.Conclusion
Making vanilla extract at home isn’t just a project; it’s a way to deepen your baking. With quality ingredients and patience, you create a pure, aromatic vanilla that brightens every dessert. The rich scent alone makes the wait worthwhile—your baking will thank you.Fall Picks
fall essentials
As an affiliate, we earn on qualifying purchases.