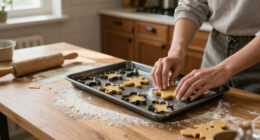
Build a practical toolkit for baking recipes that use whole grains, fruit, nuts, seeds, or less added sugar. This guide is for beginner home bakers who want to select suitable tools, measure ingredients accurately, and prepare pans without relying on unnecessary equipment. You will need about 30–60 minutes to check what you already own and fill any gaps; allow another 5–15 minutes before each bake to gather and prepare your tools.

Get baking supplies delivered free with Prime
- Fast, free delivery on millions of items
- Prime Video, Amazon Music and more included
- Member-only deals all year

Amazon Basics Silicone Rectangular Baking Mat, Non-Stick, Reusable, Dishwasher Safe, 16.5" x 11.6", Beige/Gray, 2-Pack
- ✔ Brand: Amazon Basics
- ✔ Quantity: 2 mats
- ✔ Material: BPA-free silicone

Silicone Jar Spatula Set – Long Handle Sourdough Scraper, Skinny Spatulas for Jars, Bottles, and Containers
- ✔ Brand: GZLT
- ✔ Quantity: 4 spatulas
- ✔ Material: Food-grade, BPA-free silicone

13-Inch Danish Dough Whisk with Long Wooden Handle
- ✔ Brand: COOKSURE
- ✔ Quantity: 1 whisk
- ✔ Length: 13 inches
Difficulty: Beginner | Time: 30–60 minutes to review your kitchen and choose tools; 5–15 minutes of setup before each bake
What You’ll Need
Tools & Materials:
- Dry measuring cups or a kitchen scale
- Liquid measuring cup
- Measuring spoons
- Mixing bowls in at least two sizes
- Whisk and sturdy spatula
- Baking sheet or one common cake or loaf pan
- Parchment paper, or a reusable baking mat compatible with your pan
- Cooling rack
Knowledge:
- Basic ability to follow a recipe and recognize its measurement units
- Awareness that whole-grain, low-sugar, and fruit-based batters can behave differently from standard batters
Start with the pans and utensils you already use. Check recipe pan sizes before buying anything: a different pan changes baking depth and timing. If you bake by weight, use a digital scale that can switch between grams and ounces and reset to zero after each ingredient.
Amazon Basics Silicone Rectangular Baking Mat, Non-Stick, Reusable, Dishwasher Safe, 16.5" x 11.6", Beige/Gray, 2-Pack
For readers who want a tool that changes how food goes onto the tray, this two-pack is the strongest match for healthy baking. Its non-stick silicone surface is designed for baking or roasting without oil, cooking spray, or parchment paper. That makes it more directly connected to lower-oil preparation than the jar spatulas or dough whisk, which help with handling and mixing rather than the cooking surface itself.The 16.5-by-11.6-inch mats are sized for standard trays, and the flexible material can be rolled or stored flat. We can use them for cookies, pastries, vegetables, or rolling dough, so they cover more than one baking task. Compared with the GZLT spatulas, they have a clearer effect on the cooking process; compared with the COOKSURE whisk, they serve a wider range of recipes.The main constraint is important: each mat must sit on a baking tray and cannot go directly on the oven rack. The 480°F limit also means we should keep them within the stated temperature range. Buyers who prefer direct contact between food and metal, or who need a surface for very high-heat cooking, should look elsewhere. For ordinary tray baking and roasting, though, this is the most straightforward way in this lineup to reduce reliance on disposable liners and added oil.
Pros:
- Non-stick surface is designed to work without oil, cooking spray, or parchment.
- Two reusable mats cover multiple tray-baking and roasting tasks.
- Dishwasher safe for convenient cleanup.
- Flexible construction rolls up or stores flat.
Cons:
- Must be placed on a baking tray and cannot sit directly on an oven rack.
- The 480°F maximum limits use in higher-heat applications.
- Silicone mats may not suit cooks who want food directly on a bare metal tray.
Best for: Home bakers and cooks who regularly use trays for cookies, pastries, or vegetables and want a reusable non-stick surface that can reduce the need for added oil and parchment.
Not ideal for: Anyone who needs an oven surface without a tray, cooks above 480°F, or expects the mat to replace a baking sheet.
Bottom line: We recommend this two-pack first for its clear role in reducing oil and disposable liners across routine tray baking.
“We recommend this two-pack first for its clear role in reducing oil and disposable liners across routine tray baking.”
Silicone Jar Spatula Set – Long Handle Sourdough Scraper, Skinny Spatulas for Jars, Bottles, and Containers
When a recipe calls for the last spoonful of nut butter, yogurt, or batter, these narrow spatulas are designed to reach where a standard spatula cannot. The four-piece set has long, 9.5-inch handles and flexible tips for jars, bottles, and containers. That makes it the lineup’s practical choice for recovering ingredients and keeping cleanup manageable, rather than changing how food bakes as the Amazon Basics mat does.Each spatula is described as food-grade, BPA-free silicone with a stainless-steel core. The core supports the handle while the tip remains flexible, a combination that helps with scraping without making the utensil feel as bulky as a rigid scraper. The seamless design is dishwasher safe, and hanging holes offer a storage option. Compared with the COOKSURE whisk, this set is more versatile for small everyday tasks; compared with the baking mat, it supports less waste at the prep stage instead of replacing liners on a tray.There is a specification to check before using these near heat: the supplied description gives two different limits, 445°F and 600°F. Because that is inconsistent, we would not choose this set on the assumption that it can safely handle the higher figure; confirm the manufacturer’s guidance for intended use. Color options may also matter for kitchens seeking a specific look. These are helpful prep tools, but buyers seeking an oven accessory or a direct way to reduce added oil should choose the mat instead.
Pros:
- Four narrow spatulas reach into jars, bottles, and containers.
- Food-grade, BPA-free silicone tips are flexible for scraping.
- Stainless-steel cores add structure to the long handles.
- Seamless design is dishwasher safe and includes hanging holes.
Cons:
- The supplied heat-resistance details conflict, listing both 445°F and 600°F.
- The set helps recover ingredients but does not directly reduce oil in cooking.
- Color choices may not suit every kitchen.
Best for: Cooks who regularly use narrow jars or bottles and want to scrape out more ingredients while keeping their utensils easy to wash and store.
Not ideal for: Buyers looking for a baking surface, a tool specifically for mixing dense dough, or a clearly documented high-temperature utensil.
Bottom line: We would choose this set to reduce ingredient left-behind in containers, while treating its heat limit cautiously until clarified.
“We would choose this set to reduce ingredient left-behind in containers, while treating its heat limit cautiously until clarified.”
13-Inch Danish Dough Whisk with Long Wooden Handle
For bread makers, the COOKSURE Danish dough whisk addresses a different healthy-baking question: how to mix dense dough by hand without wrestling a balloon whisk. Its 304 stainless-steel coil is intended for sourdough, bread, and pizza dough, while the 13-inch handle gives extra reach in a deep bowl. This focused design earns it a distinct place, though it is less relevant to cooks who mainly bake cookies or roast vegetables.Compared with the GZLT set, this whisk is built to move and combine a larger mass of ingredients rather than scrape small containers. Compared with the Amazon Basics mat, it does nothing to reduce oil or replace parchment; its value is in the mixing stage and the dough types it is made for. The stainless-steel head is described as rust and corrosion resistant, while the wooden handle offers a comfortable grip.That extra length is useful in deep bowls but can feel awkward in a small one, so compact-kitchen bakers should consider their usual equipment. Wood also needs more attention than the dishwasher-safe silicone tools in this roundup: moisture care matters to prevent the handle from absorbing water over time. Choose it if bread and pizza dough are frequent projects. If we bake varied tray recipes and want a tool with a more direct lower-oil benefit, the mat is the more relevant pick.
Pros:
- 304 stainless-steel coil is designed for thick dough.
- 13-inch handle offers reach into deeper bowls.
- Wooden handle provides a comfortable grip.
- Less bulky than a traditional balloon whisk for dense mixing.
Cons:
- Long handle may be cumbersome in small mixing bowls.
- Wooden handle requires care to limit moisture absorption.
- Its specialized mixing role does not directly reduce oil or disposable baking liners.
Best for: Home bread and pizza makers who mix sourdough or other thick dough by hand in medium or deep bowls.
Not ideal for: Bakers who mostly make cookies and pastries, use small bowls, or want a dishwasher-safe tool with no special handle care.
Bottom line: We recommend this whisk for frequent sourdough and pizza dough mixing, while occasional tray bakers will get more direct value from the mat.
“We recommend this whisk for frequent sourdough and pizza dough mixing, while occasional tray bakers will get more direct value from the mat.”
As an Amazon Associate we earn from qualifying purchases.
Before You Start
Read one or two recipes you plan to make and note their pan sizes, measurement units, and any special equipment. Healthy baking does not require a separate set of tools, and a new pan or gadget will not make a recipe healthier by itself. Avoid assuming that a sugar substitute, whole-grain flour, or extra fruit can be swapped in without changing texture or bake time. Follow the recipe’s stated substitutions and tool requirements.
Check that pans, bowls, and utensils are clean and undamaged. Use oven-safe materials only in the oven, and follow the manufacturer’s temperature limits for silicone mats and bakeware. Keep a clear, heat-safe place ready for hot pans.
Step-by-Step Instructions
Step 1: Choose the recipes you want to make
Select two or three recipes that reflect the kinds of baking you plan to do, such as oat muffins, whole-grain bread, or fruit bars. Write down the pan size and shape, whether the recipe uses weight or volume, and any tool it specifically names. Use this list to guide your choices instead of buying a large kit.
Tip:Recipes with whole-grain flour or fruit may make thicker or wetter batters. The recipe’s stated pan size and mixing directions matter.
Check: You have a short list of recipes and a written list of the tools they require.
Step 2: Check your measuring tools
Gather your dry measuring cups, liquid measuring cup, measuring spoons, and kitchen scale if you own one. Check that cup markings are readable and that the scale switches on and returns to zero. Prefer weighing flour when the recipe gives a weight; scooping flour with a cup can pack in extra and make baked goods dry or dense.
Tip:Do not use a liquid measuring cup to portion dry flour by volume when the recipe calls for dry cups. For dry ingredients, fill the correct cup and level it as directed by the recipe.
Check: You can read the measurements clearly, and the scale displays zero with an empty bowl placed on it.
Step 3: Gather basic mixing tools
Set out two mixing bowls, a whisk, and a flexible spatula. Choose bowls large enough to mix without spilling. Use the whisk to combine dry ingredients or beat wet ingredients, then use the spatula to fold in fruit, nuts, or flour and scrape the sides of the bowl.
Tip:Mix only as much as the recipe directs after adding flour. Overmixing can make muffins, quick breads, and other tender bakes tough.
Check: Your bowls sit securely on the counter, and the whisk and spatula reach the bottom and sides.
Step 4: Select the pans your recipes require
Match the pan’s shape and dimensions to each recipe. Check the measurement across the inside of the pan rather than relying on its label. Look for a flat, stable base and intact coating. Use glass, metal, or other oven-safe bakeware according to the recipe and the manufacturer’s instructions; changing material or size can affect browning and baking time.
Tip:Do not fill a pan beyond the recipe’s guidance. A smaller pan can cause batter to overflow or remain underbaked in the center.
Check: You have a suitable pan for each chosen recipe, and its material is safe for the recipe’s oven temperature.
Step 5: Prepare a nonstick pan surface
Follow the recipe’s directions to grease the pan, line it with parchment, or use a reusable baking mat. Trim parchment to fit the base when needed, leaving enough edge to lift bars or loaf slices without covering an oven vent or touching a heating element. Place a reusable mat flat on a compatible pan.
Tip:Do not assume every recipe works with an ungreased pan. Fruit and reduced-fat batters may stick more readily, so follow the recipe’s preparation instructions.
Check: The pan surface is evenly prepared, and the lining lies flat without hanging near the oven’s heating elements.
Step 6: Set up a cooling area
Place a cooling rack on a stable, heat-safe counter before the pan goes into the oven. Leave room around the rack for air to circulate. If you will remove a loaf or bars from the pan, check the recipe for how long they should cool before lifting or cutting them.
Tip:Use dry oven mitts when moving hot pans. Damp fabric transfers heat more quickly and can burn your hands.
Check: The rack is stable, clear of clutter, and large enough to hold the hot pan or baked item.
Step 7: Arrange tools before measuring
Place the recipe, ingredients, bowls, measuring tools, pan, and spatula within reach. Set the oven temperature and rack position as directed. Measure ingredients in the order the recipe uses them, returning each tool to the counter rather than leaving it in the ingredient container.
Tip:If measuring sticky ingredients such as honey or nut butter, check the recipe’s method. A lightly greased measuring spoon or cup can help release them when appropriate.
Check: All required ingredients and tools are ready, the oven is set as directed, and you can follow the recipe without stopping to search for equipment.
Common Mistakes to Avoid
- Buying tools before checking what the recipes require. — Compare your chosen recipes first, then buy only missing tools and pans in the sizes they specify.
- Measuring flour by packing it into a cup. — Use a scale and the recipe’s stated weight when available. If measuring by volume, use the recipe’s filling and leveling method.
- Changing pan size or material without adjusting expectations. — Use the specified pan when possible. If you must substitute, expect the bake time and browning to change, and check doneness using the recipe’s cues.
- Overmixing after adding flour. — Follow the mixing instructions and stop when the batter reaches the texture described in the recipe.
Troubleshooting
Problem: The batter seems much thicker or thinner than the recipe describes.
Solution: Pause before adding extra liquid or flour. Recheck your measurements, especially flour, and confirm that you used the correct ingredient form and units. Add anything only if the recipe directs you to adjust the batter.
Problem: The bake sticks to the pan.
Solution: Check whether the recipe called for grease, parchment, or a mat. Let the bake cool for the stated time, then loosen the edges gently with a suitable utensil. Prepare the pan as directed next time.
Problem: The edges brown before the center is done.
Solution: Check that the pan size, material, oven rack position, and oven temperature match the recipe. Use the recipe’s doneness cues and avoid increasing the temperature to speed up baking.
Problem: The scale reading changes while you measure.
Solution: Set the scale on a firm, level surface, check its batteries, and press tare with the empty bowl in place. Add ingredients slowly and confirm the selected unit before continuing.
What Success Looks Like
Your toolkit matches the recipes you plan to bake, the measuring tools are readable and working, and each pan is the correct size and safely prepared. During baking, you can measure ingredients as written, mix with the tools the recipe calls for, and place the finished bake on a stable cooling rack. The result should match the recipe’s visual and doneness cues, such as a set center or a clean tester when specified.
Next Steps
After baking, let tools and pans cool before washing them. Clean and dry bakeware according to its care instructions, and store measuring tools where you can find them. Note which pan, lining, and measuring method worked well for each recipe. Replace tools only when they are damaged, unreadable, or no longer fit the recipes you make. When trying a new recipe, check its equipment list before starting and add specialized tools only if the method requires them.
Frequently Asked Questions
Do I need special tools for healthy baking?
No. Most recipes use standard bowls, measuring tools, a whisk or spatula, and the specified pan. Buy specialized equipment only when a recipe requires it or you use it often.
Is a kitchen scale better than measuring cups?
A scale gives a consistent weight when the recipe provides one, especially for flour. Use the units and method printed in the recipe; do not convert measurements by guesswork.
Can I use silicone bakeware or a reusable mat?
Use silicone only within the manufacturer’s temperature limits and on a stable baking sheet when the product instructions call for one. A mat is suitable only when the recipe and mat instructions allow it.
Can I substitute a different pan if I do not have the listed size?
A different size changes batter depth and baking time. Choose the closest safe match, keep an eye on the recipe’s doneness cues, and avoid filling the pan beyond its guidance. For a first attempt, the specified size is the most predictable choice.