
TL;DR
Leveling, filling, and stacking a cake is about patience and precision. Using the right tools and steps prevents disasters and results in a beautiful, stable cake that tastes as good as it looks.
Creating a perfectly layered cake isn’t just about mixing ingredients. It’s about the right techniques, patience, and a few smart tools. When you master leveling, filling, and stacking, you turn a simple batter into a showstopper—without the dreaded tilts or collapses.
Think of it like building a sturdy tower with blocks. If one block is uneven or misaligned, everything wobbles. The same goes for your cake. This guide will show you how to do each step with confidence, so your cake comes out flawless and ready to impress.
Chill your cake layers before leveling and stacking for cleaner cuts and better stability.
Use internal supports like dowels for multi-tier cakes, especially with heavy layers.
Apply filling sparingly and evenly to prevent squeeze-outs and uneven layers.
Invest in a good cake leveler and supports—these tools save time and frustration.
Take your time, work slowly, and keep your workspace cool to avoid disasters.
How to Properly Level Your Cake Layers for a Flawless Finish
Leveling the cake is the first step to avoiding a lopsided, unstable cake. An uneven top can cause the filling to squeeze out or the cake to tilt.
Use a serrated knife or a cake leveler to trim the domed top after baking. For precision, a wire cake leveler lets you set the height and cut smoothly. Chill the cake for 20-30 minutes beforehand—this firms the crumb and makes trimming easier. Imagine slicing through a firm, cold loaf of bread—clean, controlled, and neat.
For example, if your cake baked a little unevenly, you might trim a 1/4 inch off the domed side. It’s small but makes a huge difference in how stable and professional it looks.
Why it matters: Properly leveling ensures that each layer has a flat, even surface, which is crucial for stability. An uneven layer can cause the entire cake to lean or wobble, increasing the risk of sliding or collapsing when stacked. It also affects the aesthetics—no one wants a crooked cake at a celebration. The tradeoff is that over-trimming can remove too much cake, so aim for a balanced approach that preserves enough height while creating a flat surface.
As an affiliate, we earn on qualifying purchases.
The Best Way to Fill Your Layers Without Mess or Squeeze-Outs
Filling a cake isn’t just about spreading—it’s about controlling the amount and consistency to prevent oozing or uneven layers.
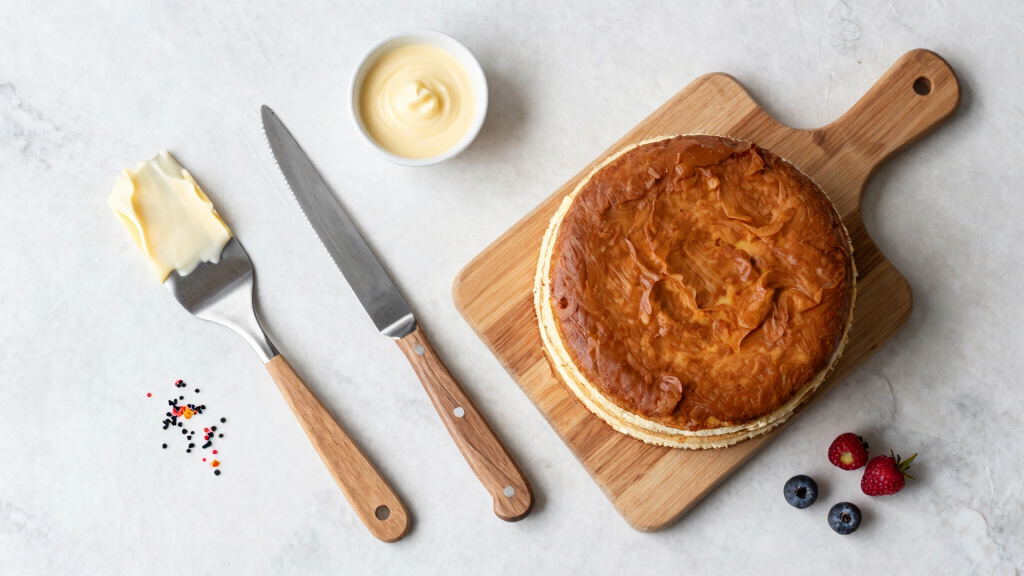
Start with a stable filling like buttercream or ganache. Use about 1/4 inch thick—it’s enough to add flavor and moisture without forcing the sides out. Apply dollops of filling across the center of the layer, then use an offset spatula to spread outward in a gentle, even layer. Think of it like smoothing paint—slow and steady wins the race.
For instance, when stacking a carrot cake, I use a generous but controlled layer of cream cheese frosting, making sure it’s even before placing the next layer.
Why it matters: Proper filling prevents the cake from bulging or sliding apart, especially during transport or cutting. Too much filling can cause squeeze-outs, making a mess and compromising the structure. Too little results in dry layers or gaps. The tradeoff involves balancing flavor, moisture, and structural integrity—using just enough to enhance taste without sacrificing stability. Applying filling evenly and at the right thickness ensures each bite is delicious and the cake remains neat and stable.
cake dowel supports for multi-tier cakes
As an affiliate, we earn on qualifying purchases.
As an affiliate, we earn on qualifying purchases.
How to Stack and Support Your Cake for a Disaster-Free Build
Stacking is where many bakers run into trouble. Without proper support, heavy tiers topple, or uneven layers slide apart.
Use dowels or cake supports, especially for multi-tiered cakes. Insert support rods deep into each layer, then trim to height, so the weight is evenly distributed. For example, in a three-tier wedding cake, I use three dowels per layer, spaced evenly in a triangle. This keeps everything aligned and prevents collapse.
Chill the assembled layers for 30 minutes to set everything before applying the final crumb coat. This step is like giving your cake a pause—letting the structure stabilize so it can handle the final decorations.
Why it matters: Internal supports distribute the weight of heavier layers, preventing the cake from collapsing under its own weight. They also help maintain alignment, especially if the cake needs to be transported or displayed for hours. The tradeoff is that supports can be visible if not placed carefully, so choosing supports that blend or are hidden within the cake is crucial. Properly supported cakes are less likely to wobble or topple, ensuring your creation remains pristine until the moment it’s served.

PUCKWAY Angled Icing Spatula, Stainless Steel Offset Spatula, Cake Spatula Set of 2 Black 6, 8 inch Blade
- Set Includes Two Sizes: 6-inch and 8-inch blades for versatility
- Ergonomic Non-Slip Handles: Comfortable, lightweight grip for precise control
- Multi-Purpose Use: Ideal for icing, spreading, and cutting tasks
As an affiliate, we earn on qualifying purchases.
As an affiliate, we earn on qualifying purchases.
Latest Tools and Techniques That Make Cake Stacking Easier
Innovation has made stacking cakes safer and more precise. Adjustable cake levelers, clear acrylic supports, and innovative stabilizers have changed the game.
Adjustable wire cake levelers give you perfect, uniform slices—no more guesswork. Clear acrylic dowels blend seamlessly into your cake, making the support invisible. Some bakers are even using semi-naked or textured frosting styles to hide minor imperfections from leveling or stacking mishaps.
For example, I recently used a new adjustable leveler to trim a tall sponge, and the result was perfectly even layers—saving time and frustration.
Why it matters: These tools reduce the risk of uneven layers or support visibility, which can compromise the cake’s appearance and stability. Investing in these tools streamlines the process, saves time, and results in a more professional finish. The tradeoff is that some of these tools require an initial investment and a learning curve, but their benefits in achieving a flawless cake are well worth it.

Kootek 158 Cake Decorating Kit Baking Supplies Tools for Beginners & Pros
- Complete Cake Decorating Kit: 158 pieces for all decorating needs
- Spinning Cake Turntable: 11-inch diameter with 360° rotation
- Variety of Piping Tips: 49 standard, 8 Russian, 7 Korean tips
As an affiliate, we earn on qualifying purchases.
As an affiliate, we earn on qualifying purchases.
What You Need to Know About Cake Temperatures and Storage
Temperature plays a big role in how well your cake holds together. Bake at the right temp, usually 350°F (177°C), and don’t rush cooling; a warm cake can crumble or slide.
Chill your layers before trimming, filling, or stacking. Refrigerate the assembled cake for at least 30 minutes before applying the final coat. This firms the structure and makes handling easier. Also, keep your cake covered or wrapped if you’re storing it for longer—exposure to air can cause drying or sweating.
Why it matters: Proper temperature control prevents structural weaknesses caused by uneven cooling or condensation. A warm or improperly cooled cake can be too soft, leading to cracks or collapsing layers. Conversely, overly cold cakes can become brittle and prone to cracking when handled. The tradeoff involves timing—cooling too quickly might cause condensation, while cooling too slowly might make the cake difficult to work with. Proper storage and temperature management ensure your cake’s integrity from oven to serving.
Troubleshooting Common Cake Assembly Problems
Even experienced bakers hit snags. The key is knowing how to fix or prevent the issues.
- Tilting layers: Recheck your support system and center each layer carefully.
- Filling squeezing out: Use less filling and make sure your layers are level and chilled.
- Collapsed tiers: Use internal supports and don’t rush the assembly process.
For example, I once had a tier slide during stacking. A quick addition of extra support dowels and chilling the cake fixed the problem without starting over. Recognizing these issues early and applying the right fixes can save time and prevent waste, turning potential disasters into learning moments and ensuring your final presentation is flawless.
Final Tips for a Perfect, Disaster-Free Layer Cake
Patience is your best friend. Take your time with each step. Invest in quality tools like serrated knives, supports, and levelers. Practice makes perfect—even if your first few cakes aren’t picture-perfect, you’ll learn with each attempt.
Keep your workspace cool, especially when working with buttercream or fondant. That prevents melting, sliding, or tearing. Remember: a calm baker makes a perfect cake.
Frequently Asked Questions
How do I avoid cracking or crumbling when leveling a cake?
Chill your cake first to firm the crumb, then use a serrated knife or wire leveler. Work slowly and gently, stopping if you feel resistance. A chilled cake slices more smoothly and minimizes cracks.What’s the best way to ensure my filling doesn’t squeeze out?
Apply a thin, even layer of filling—about 1/4 inch thick—and chill the layers before stacking. Use an offset spatula to spread gently, and don’t overfill, which can cause squeezing and mess.How can I keep my stacked cake from toppling over?
Use internal supports like dowels, ensure each layer is centered and level, and refrigerate the assembled cake before decorating. Proper supports distribute weight and stabilize your structure.Can I assemble a cake ahead of time?
Yes, but refrigerate it to set the structure and prevent spoilage. Cover with plastic wrap or a cake dome to keep it fresh. Wait to decorate with delicate frosting until close to serving time.What’s a quick tip for a super-smooth frosting finish?
Apply a crumb coat first, then chill for 30 minutes. Follow with a final layer of frosting, using a bench scraper or spatula for a sleek look. Keep the workspace cool to prevent melting.Conclusion
Building a stable, beautiful layer cake is about precision, patience, and the right tools. When you master these steps, you turn a simple batter into a show-stopping centerpiece—without the mess or mishaps.
Every cake you make gets easier with practice. So, set aside time, use your tools, and celebrate each success. Your perfect cake is just a few careful steps away—ready to impress and delight.